You can set Chrome to use proxy servers. This article will discuss how to use a proxy server with Chrome. There could be minor differences in setting a proxy server depending on your operating system. Regardless of your machine’s operating system, we will still be teaching you how to use a proxy server with Chrome. This article will cover tutorials for Windows and Mac computers.
Proxy servers act as intermediary servers between your computer and the Internet. Proxies, short term for proxy servers, hide your physical location and may allow you to access sites that are otherwise blocked with your current location and connection. This article will discuss how you can use a proxy server with Chrome.
How to Use a Proxy Server With Chrome
This article outlines two methods to use a proxy server with Chrome. The first method will be for users who are on Windows computers. The second method will be for Mac users. The screenshots used in the article uses the latest Chrome version as of writing. There could be minor differences in interfaces depending on your Chrome version.
Method 1: Use a Proxy Service With Chrome for Windows
If you are using Microsoft Windows, follow the steps below to use a proxy service with Chrome:
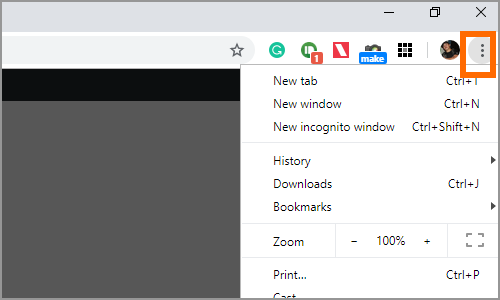
1. Open Google Chrome and click on the Chrome menu located on the upper-right part of your browser’s toolbar.
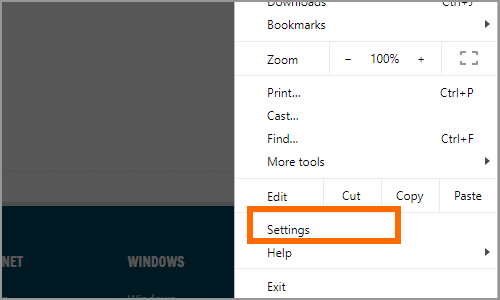
2. Then from the Chrome menu, click on Settings.
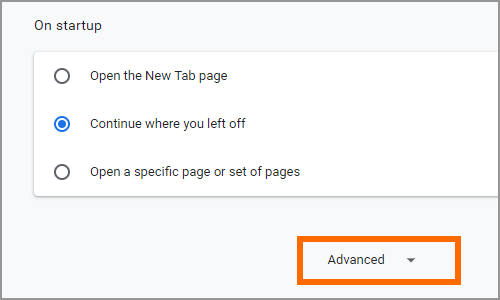
3. The Settings page loads up. Click scroll down to the bottom-most part of the screen and click Advanced.
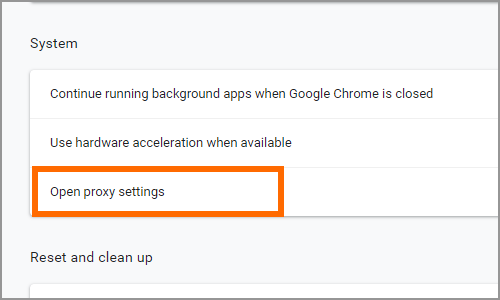
4. The list of Advanced option shows. Scroll down to System section then click on the Open Proxy Settings option.
5. The Internet Properties show. Click on the LAN Settings button under the Local Area Network (LAN) Settings.
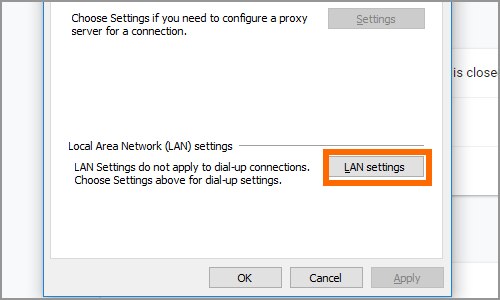
6. Under the Proxy Server section, click on the tick button that says: “Use a proxy server for your LAN (These settings will not apply to dial-up or VPN connections).
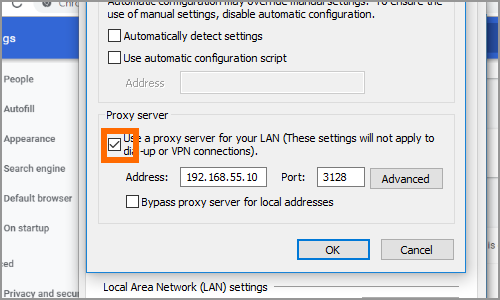
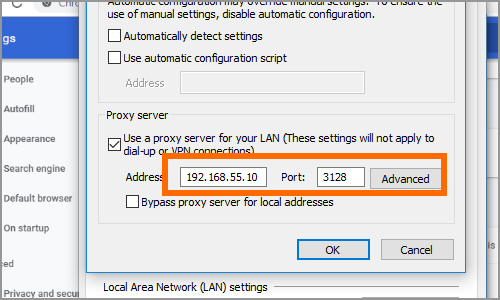
7. Enter the Proxy Server address and the port to use. You can click on the Advanced button to specify proxies per server type.
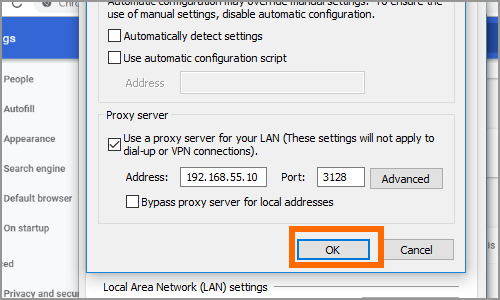
8. Click on the OK button to save changes.
Method 1: Use a Proxy Service With Chrome for Mac
If you are using Mac, follow the steps below to use a proxy service with Chrome:
1. Open Google Chrome and click on the Chrome menu located on the upper-right part of your browser’s toolbar.
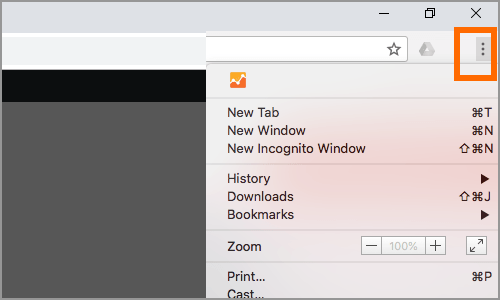
2. Then from the Chrome menu, click on Settings.
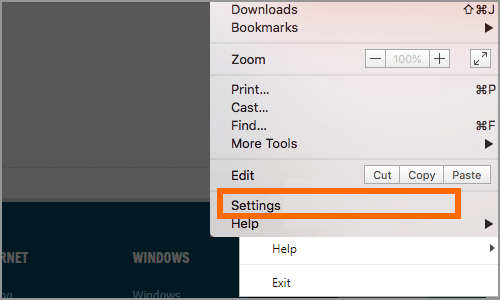
3. The Settings page loads up. Click scroll down to the bottom-most part of the screen and click Advanced.

4. The list of Advanced option shows. Scroll down to System section then click on the Open Proxy Settings option.

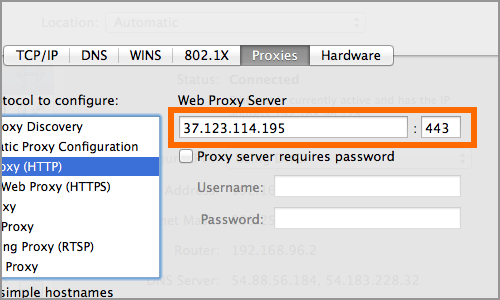
5. The Network Properties show. Click on the Proxies tab.
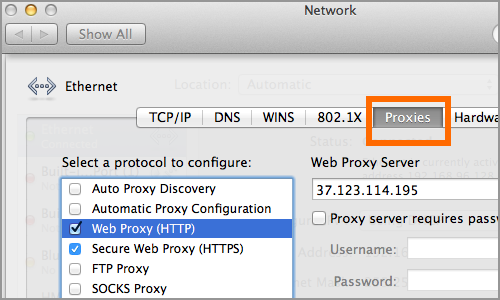
6. Once you are on the Proxies tab, click on the tick box for Web Proxy (HTTP) and Secure Web Proxy (HTTPS). If you know what you are doing, you can also put a tick mark on the other connection type.
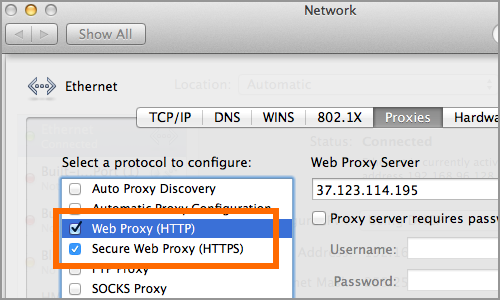
7. Enter the Proxy Server address and the port to use. If the proxy server requires a password, click on the tick box that says: “Proxy server requires password” and the username and password.
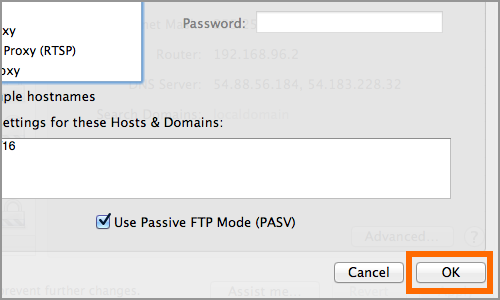
8. Click on the OK button to save changes.
You just learned how to use a proxy server with Chrome for Windows and Mac. If you have questions about any of the sections above, let us know in the comments section.
If you think this article is helpful, then you might want to check on these related articles:
How to Full Screen in Google Chrome
Google Chrome: How to Check for Updates
How to Add and Remove Trusted Sites in Google Chrome
Downgrade Google Chrome Browser
How To Customize Google Chrome Background
Allow Cookies in Google Chrome
How To Change Google Chrome Font

