With the introduction of iOS 12, Apple brings in subtle but useful changes to the way people use their iPhones. For one, there is a revamp in the Notifications feature that now gives users better control over their notifications. Notifications can now be grouped into app types and senders. This article will guide you on how to get the most out of your Notifications in iOS 12.
Notifications help users know about messages, updates, and other stuff that the app developers thought are noteworthy. However, too much of anything can be bad. If you have installed social media apps and other notification-extensive applications on your iPhone, you expect to have a barrage of notifications after an hour of not checking your iPhone. Such scenario may be distracting and unproductive to some people. In fact, a study showed that notifications require attentional resources thereby disrupting users and negatively affecting their productivities. Apple believes that users should have better control over their notifications – thus introducing the improved Notifications in iOS 12.
How to Master the Notifications in iOS 12
Learning how to get the most out of Notifications in iOS 12 will give you better control over your iPhone notifications. You can opt to have a cleaner Notifications panel, delete and clear notifications easier, or do changes to the way Notifications works. All of these are discussed in the sections below.
Use Grouped Notifications in iOS 12
Grouped Notifications allows you to group multiple notifications by apps, app types, or sender. You can opt to have all notifications for social media apps be grouped into one notification card, or have a special card for a specific app – say, Facebook. You can also group notifications based on senders.
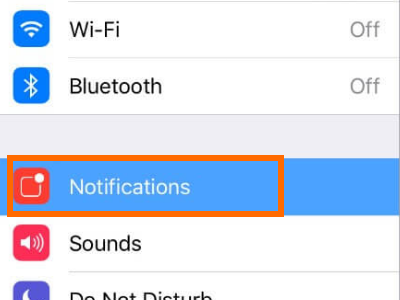
All of these can be done by going to the Notifications page in your iPhone’s Settings. You can check our detailed article on how to group iPhone notifications on iOS 12.
Take Advantage of Instant Tuning in iOS 12
Instant Tuning allows users to do a quick change in the way the app notifications behave. Now, you do not have to go to Settings and adjust each app notifications manually. Now, you can change notification behaviors of an app as they appear on your Notifications Center or Lock Screen.
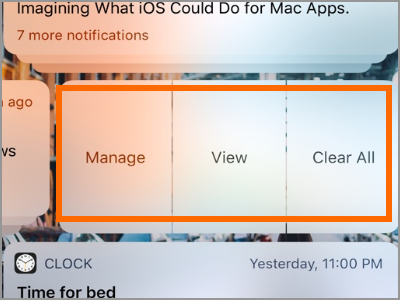
Our comprehensive article on how to use Instant Tuning in iOS 12 should guide you on how to use the feature on your iPhone.
Allow Critical Alerts in iOS 12
You can enable critical alerts to continue receiving Notifications for specific apps even if Do Not Disturb is enabled on your iPhone. Critical Alerts overrides the Do Not Disturb Mode restriction for a simple and obvious reason – there are critical to safety, health, and security.
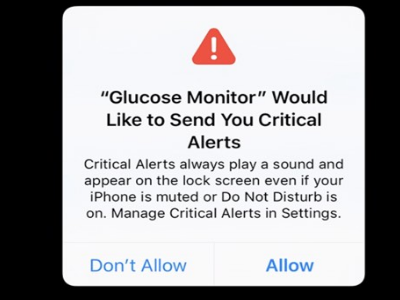
To enable Critical Alerts, you just need to the app notification options in the Settings.
It is important to note that critical alerts are not available to most apps – even if you think an app is needed for critical alerts. Developers need to apply for an entitlement from Apple for their apps to be allowed with Critical Alerts.
Monitor Notifications Screen Time
iPhone now allows you to monitor the number of notifications you get on a certain period. Aside from that, you can what apps love to send out notifications. The feature shows important statistics such as a timeline with the number of notifications per hour and the average number of notifications the phone gets per hour.
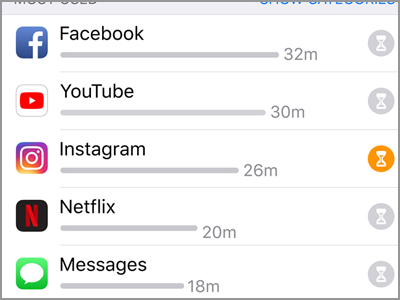
To monitor Notifications screen time, go to Home > Settings > Screen Time.
Enable Richer Notifications in iOS 12
iOS 12 now supports richer notifications. For app developers, this means that they can now build notifications that interact with users. The Richer Notifications allow a seamless and smoother user experience. Imagine being able to answer a message in the Notifications panel without actually going to any app.
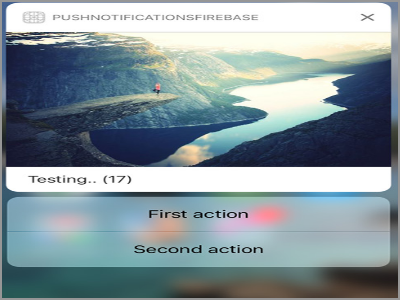
To use the Richer Notifications feature, you simply need to tap on the input section of a richer notification. Take note that, right now, only a few apps support the richer notifications feature.
Frequently Asked Questions
Q: I followed the steps but I can’t seem to find the Notification options.
A: You need to enable Notifications first before you can find the options. If the Notifications is disabled, all the other options are disabled and will not be available.
Q: Can I enable Notification Group for all apps at once?
A: Though the idea is good and may be neat, Apple thinks that it would be best if you would have to enable each option manually for each app.
Q: Why can’t I find the new Notifications option on my iPhone?
A: The new notification feature is only available for iPhones and iPads running on iOS 12. If your device is on a lower version of the iOS, then the feature is not available for your device.
You just learned. how to get the most out of your Notifications in iOS 12. If you have questions about any of the steps above, let us know in the comments section.
Do you think that this article is helpful? Then, share this article with your friends through your social media accounts.

