With Box.net giving iOS users 50GB of space, their service is definitely worth checking out. If you want to use it, mapping drives to your Box.net folders will make transferring files much simpler.
1. Click the Orb (Start button) and select Computer from the Start Menu.
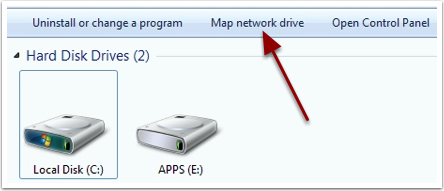
2. From the horizontal menu at the top, select Map network drive.
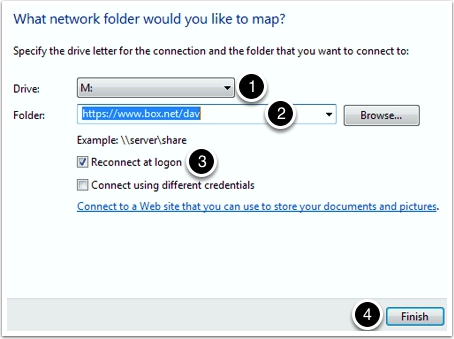
3. Use the Drive dropdown to select the desired drive letter. In the folder textbox, input the following:
https://www.box.net/dav
Make sure that the Reconnect at logon checkbox is checked.
Click Finish.
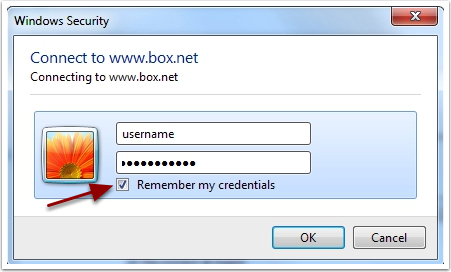
4. When prompted, input the username and password for your Box.net account. Check the Remember my credentials checkbox. Click OK.
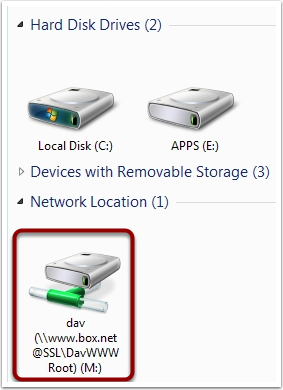
5. Your mapped drive will be created with the name dav (\\www.box.net@SSL\DavWWWRoot).
6. To change the name of the mapped drive, right-click the drive and select Rename.
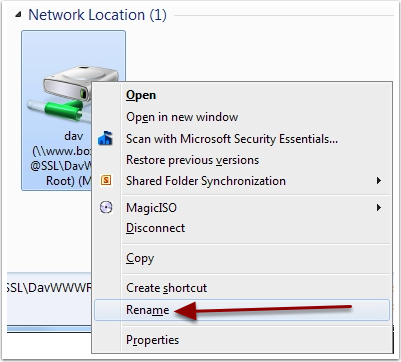
7. Input the desired name for your drive and press Enter. The drive will now have the desired name.
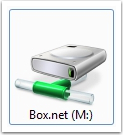
The above steps will create a mapped drive to the root of your Box.net storage folder. To create a mapped drive to an individual folder, you will use the following address in step #3:
https://www.box.net/dav/foldername
where foldername is the name of the desired folder. For example, if I wanted to map a drive to the documents folder at Box.net, I would use https://www.box.net/dav/documents
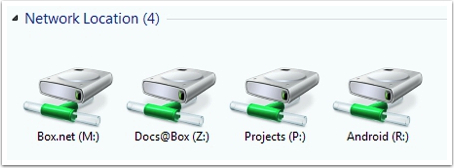
So you can map drives to your entire Box.net account, as well as all folders that you have within it.


Quality articles or reviews is the key to be a focus for
the visitors to go to see the website, that’s what this web page is
providing.