Bored with your windows 7’s default logon screen? Here’s the quick way to change it!
Before we start, make sure your picture is in .jpg format and it must be smaller than 256kb. Be careful to pay attention to the different directions based on which Windows 7 system you have. There are combined instructions for both systems at the bottom of the article.
===============
For Windows 7 Ultimate and Enterprise users
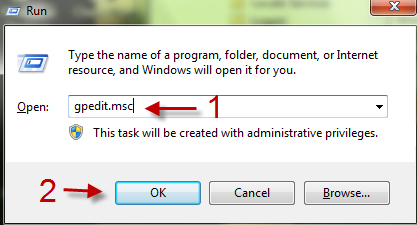
1. Hit Winkey+R to open the Run box.
2. Type in gpedit.msc and click on OK to open Local Group Policy Editor.
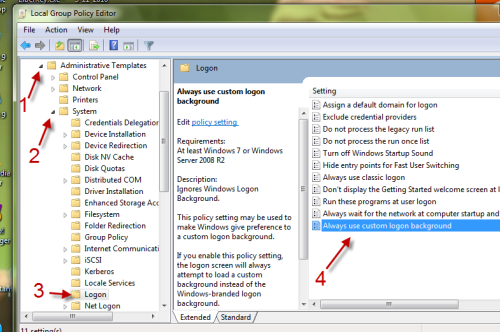
3. Go to Computer Configuration\Administrative Templates\System\Logon.
4. Double click on Always use custom logon background.
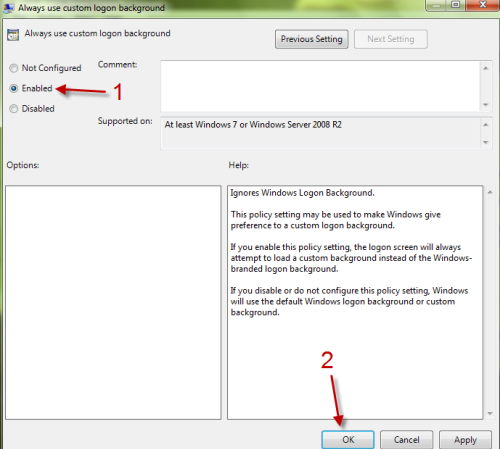
5. A new window will pop up, now you can choose Enable to use your custom logon background. Click on OK to close the window.
6. Close Local Group Policy Editor.
(Finish by following the combined directions at the end)
=============
For Windows 7 Home (Premium) users:
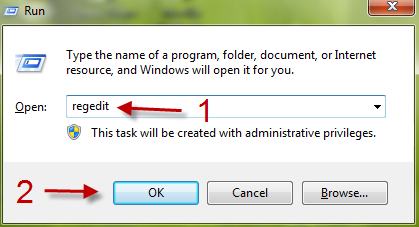
7. 1. Hit Winkey+R to open the Run box and type in regedit and hit OK to open Registry editor.
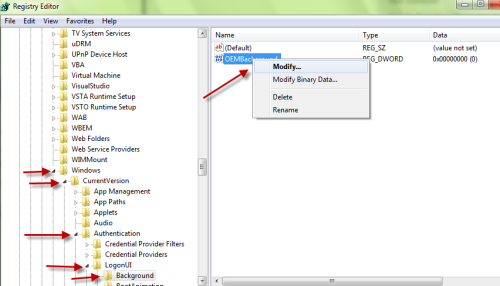
8. Go to HKEY_LOCAL_MACHINE\SOFTWARE\Microsoft\Windows\CurrentVersion\Authentication\LogonUI\Background
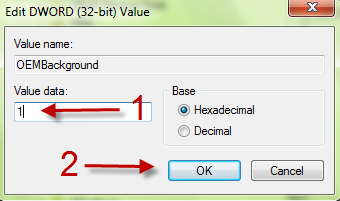
9. Double click on OEMBackground and change its value to 1. Click Ok to close the box.
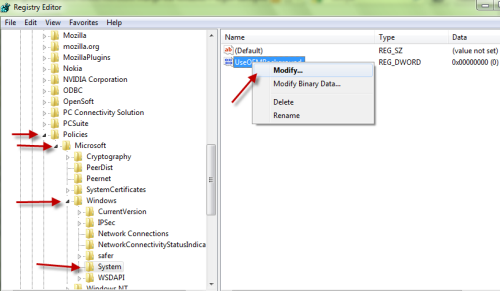
10. Go to HKEY_LOCAL_MACHINE\SOFTWARE\Policies\Microsoft\Windows\
11. Right click on Windows, choose New->Key and name it System. (If you already have this key, simply skip to step 14)
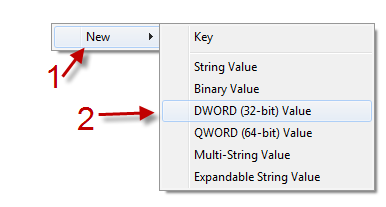
12. Right click anywhere in the right panel, choose New->DWORD (32-bit) value. Rename it to OEMBackground
13. Double click on UseOEMBackground and change its value to 1 too!
========
Change background ( For Windows Ultimate, Enterprise and Home Premium users)
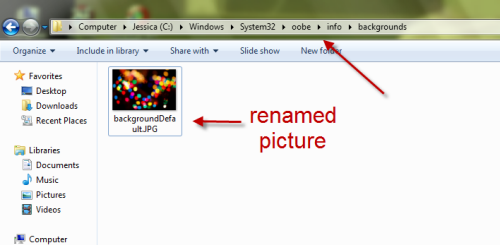
14. Open Windows Explore and go to C:\Windows\System32\oobe\info\backgrounds (If you can’t see that folder, you may need to config system to view hidden files)
15. Replace the default picture with your custom picture. You must rename your picture to backgroundDefault.jpg .
16. Close windows, logoff or press Ctrl+Alt+Del to see the result.

