Disabling the Control Panel on a computer is especially useful on shared or public-facing computers.
When disabling access to the Control Panel, you are removing the Control Panel shortcut from the Start menu and Windows Explorer. Additionally, you are unable to view or edit any of the Control Panel configurable options and settings. After you have adjusted the appropriate settings, you do not have to worry about any changes being made to your Control Panel options.
1.From your Start screen, search for and open gpedit.msc
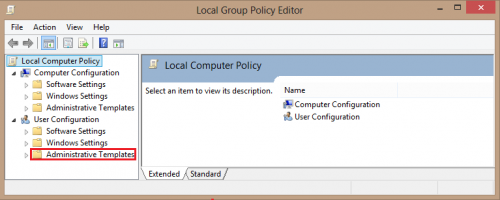
2.Under Local Computer Policy Editor expand the User Configuration option, and then click Administrative Templates. 
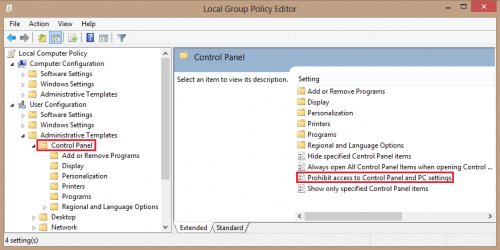
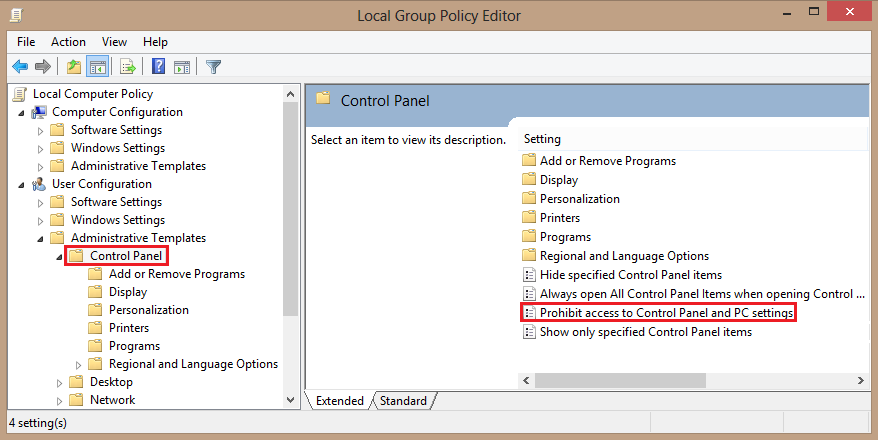
3.Open the Control Panel folder, and select the Prohibit access to Control Panel and PC settings option. 
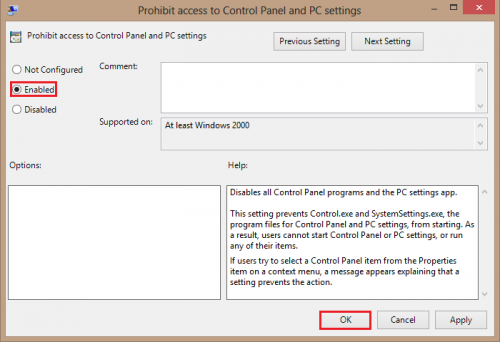
4.Now, click the box next to Enabled. You can also add a comment if you desire. This comment will be presented when the user tries to access the Control Panel. However, I am not going to include one for this tutorial. After you are satisfied with your setup, click OK to save your settings. 
Access to the Control Panel has now been restricted. This is a good method to use to prevent unwanted changes to your settings, especially when an inexperienced user has access to your PC.

