Windows 8 provides many flexible ways to customize the system. For many users the classic method for changing the Lock Screen is blocked. This tech-recipes tutorial will show you how to change the Lock screen through the Group Policy Editor and Regedit in case the built-in option is disabled.
Previously, I have covered how to change the Lock Screen, Start Screen and account picture using the Settings section. However, many users find this section locked. If it is locked, you can use either the Group Policy editor or hack the registry to make these changes.
Group Policy Editor
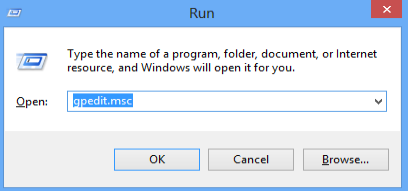
1. Press Win key + R to open the Run dialog, type in gpedit.msc and hit Enter to open the Group Policy Editor.
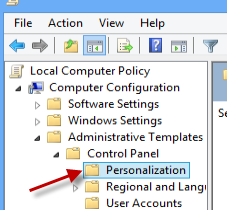
2. In the Group Policy Editor window, navigate to Administrative Templates -> Control Panel -> Personalization.
3. On the right hand side of the window, double-click on the Force a specific default lock screen image option.

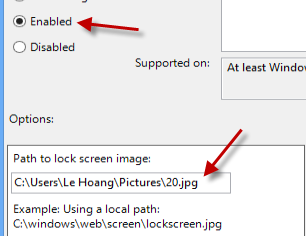
4. Change the state of this setting to Enabled and provide the location of the image which you want to set as the lock screen in the Path to lock screen image field.
5. Hit the OK button to save the setting.
Regedit
1. Open the Run dialog by pressing Win key + R, type in regedit and hit Enter.
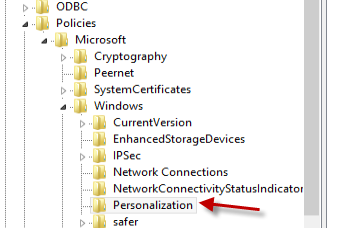
2. In the Registry Editor window, navigate to the HKEY_CURRENT_USER\Software\Policies\Microsoft\Windows\Personalization folder.
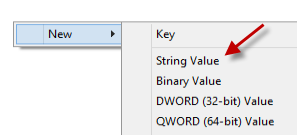
3. On the right-hand side, left-click on an empty space and choose New -> String Value. Name the new value LockScreenImage.
4. Double-click on this value and paste the path to the image in the Value data field.
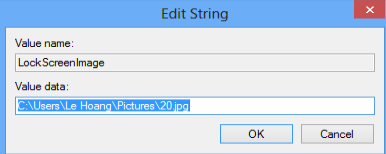
5. Click OK to save the setting and close the Editor.

