Windows 10 has returned the Start button to its original place: the lower-left part of the screen. Aside from the familiar feel of the Start menu, Microsoft has fused live tiles into the feature, giving it both a classic and fresh look. The live tiles can be personalized based on your preference. You can add or remove an application tile by pinning and unpinning it from the Start menu. In this tutorial, you will discover how to customize your Start menu by adding or removing application tiles.
How to Pin Application Icons to the Start Menu of Windows 10
To add application tiles to your Start menu, you need to pin applications icons to it. To pin app tiles, follow these steps:
1.Go to the location where the icon for the application you want to pin is visible.![]()
2.Right-click on the application icon to view available options.![]()
3.From the list of options, click on Pin to Start.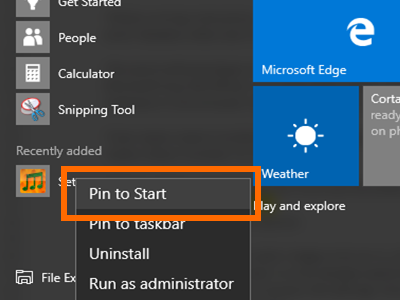
4.The application icon will be pinned to the Start menu.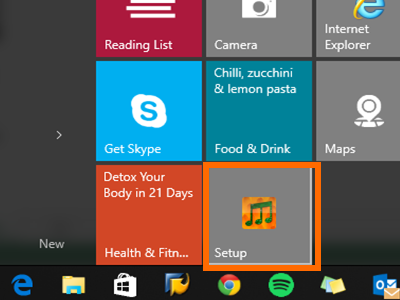
5.You can also drag and drop icons from the Start menu to the tile interface.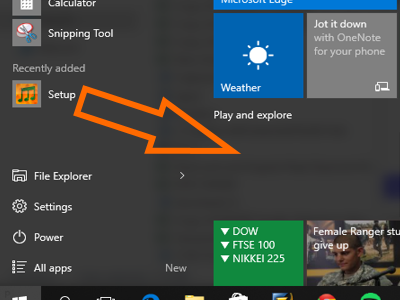
6.The application tile will be pinned to your Start menu live-tile interface. You are done.
How to Unpin Application Icons from the Start Menu of Windows 10
To start unpinning application tiles from your Start menu, follow these steps:
1.Click the Start button located on the lower-left part of your screen to open up the Start menu.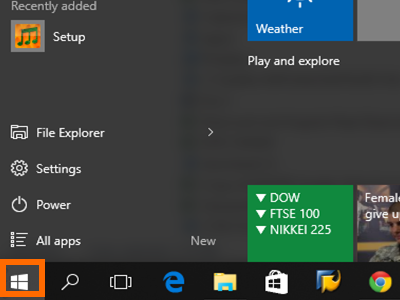
2.In the Start menu, choose an application that you want to be unpinned from the tile interface. ![]()
3.Right-click on the application icon to view available options. Select Unpin from Start.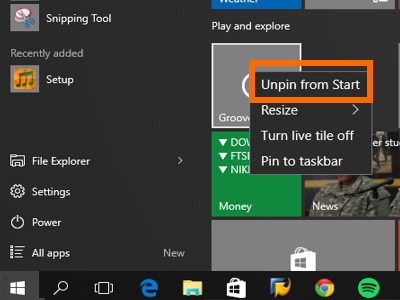
4.The application tile will be removed from your Start menu. A blank space will be available where you can add another application tile. You are done.![]()
Pinning and unpinning application icons on Windows 10’s Start menu is easy. If you have problems or issues with any of the steps above, let us know in the comments section below.


