By removing the backgrounds from images you include, you can keep your presentation looking clean and crisp.
Images and photographs make PowerPoint presentations much more interesting. Frequently, however, the backgrounds of these inclusions clash with the presentation’s theme. Instead of having to Photoshop the graphics first, PowerPoint includes a method for easily removing the background.
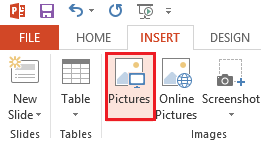
1.Select the Insert tab from the PowerPoint ribbon. Click on Pictures, and then choose the image you will be using.

2.After the image is imported click on the FORMAT tab under PICTURE TOOLS and select Remove Background.

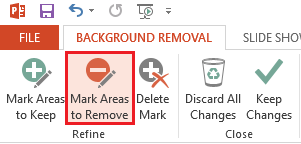
3.Now choose Mark Areas to Remove from the BACKGROUND REMOVAL options.

4.Using your cursor, click and drag to select the background. Note that all of the pink covered parts will be removed once you click out of the image. Once you have selected everything that you want to remove, click any where else in the presentation to cut out the background.

Below you can see the final product. As you can see the image looks much better after we got rid of the background. The more effort you spend on it, the nicer outline you are going to have.


