If you usually have to work on documents with the same type of table, you can save that table as a template. By doing so, you can create it later in just a few clicks rather than manually creating a new one and adjusting the columns, rows, and other settings, which may take a lot of your time.
By using a template, you cannot only save the table structure but also the content in the table. This feature is extremely useful when you want to save table headers and fields that are not changed often.
1. Launch Word 2013, and open a document. Any document is fine, even a blank one.
2. Once the document is loaded, create the table that you want save as a template. You can create a table quickly from the Insert tab -> Table option.
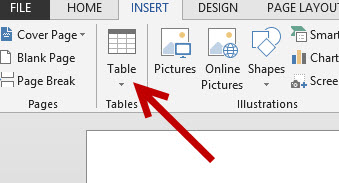
3. When you have created the table, select the whole table, comeback to the Insert tab, and click on the small arrow under the Table icon to show the menu.
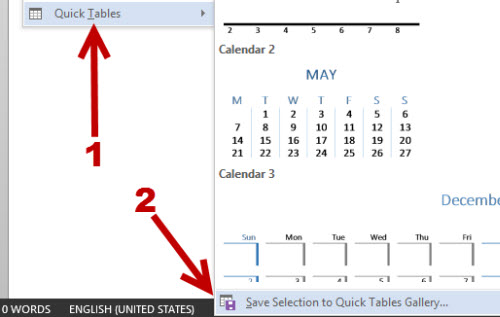
In the expanded menu, choose Quick Tables -> Save Selection to Quick Tables Gallery….
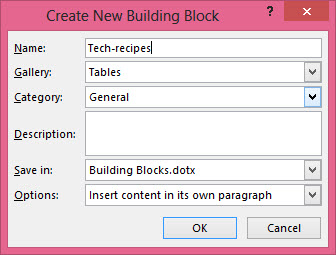
4. A new Create New Building Block window pops up on screen. Give your new table template a new name, so you can easily spot it later. Optionally, you can choose to which Gallery or Category it belongs or give it a brief description so that other people in your group know how and when to use the table. When you are done, click OK to save.
5. To insert the table template in the document, go to the Insert tab -> Table -> Quick Table.
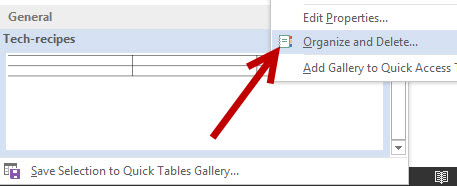
6. Later, if you want to delete the table template from the list, come back to the Table’s menu -> Quick Tables -> Choose the one that you want to delete -> Right-click on it, and choose Organize and Delete.
7. In the new window, select the desired table if it is not highlighted, and then click the Delete button. If any warning pops up on screen, click Yes to confirm the deletion.


