Adding a watermark to your final document can help to make it secure. Word Office comes preloaded with many default watermarks from which to choose. However, you can also create a custom one that either uses text or an image. This is useful if you want to insert a company logo or other personal image as your watermark.
A watermark in Microsoft Word is an image or text that appears behind the main text of your document. A watermark can be used to establish ownership, make photocopying more difficult, provide warnings, or to just add decoration.
Before you begin, you should have your finished document open.
1.First, select the Design tab from the Word ribbon.

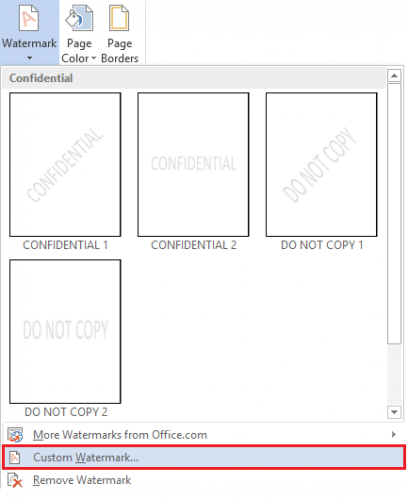
2.Now, select Watermark, and at the bottom, choose Custom Watermark…

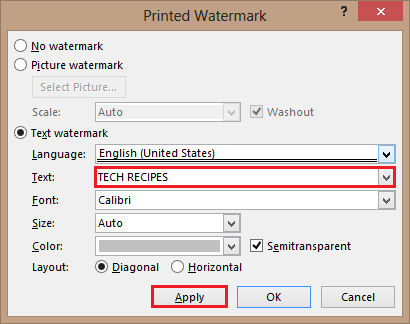
3.A Printed Watermark options window will appear. From here, select either Picture or Text watermark. For this tutorial, I will insert a text watermark. After you have entered your text or image, click on Apply and then hit OK.

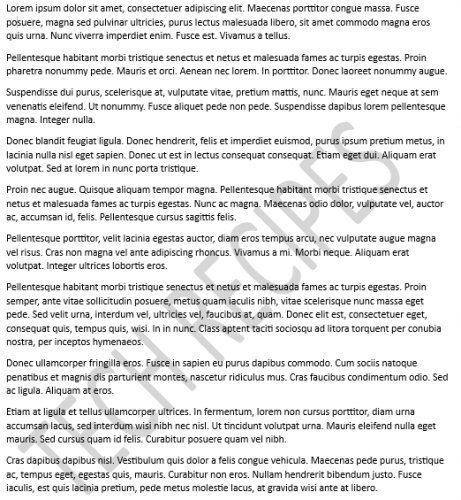
Below you can see the final product with a custom watermark. You can adjust the Printed Watermark settings to create a watermark that best suits your document.


