For many of us authors, typography is an intensely personal and important aspect of our art. Increasing the line spacing within Word is one of the most frequent adjustments.
The line spacing on classic versions of Word is 1 pt. Many people feel that is quite tight for the average document. Newer versions, such as Word 2010 or 2013, use a better 1.15 pt for their default line spacing. If this line spacing remains too tight for your taste, you can adjust it. Even better, you can change the defaults so that you are not forced to change the spacing manually for every new document.
1.You should have Microsoft Office Word 2013 running, and you should have inserted some text. Select the DESIGN tab from the Office ribbon. 
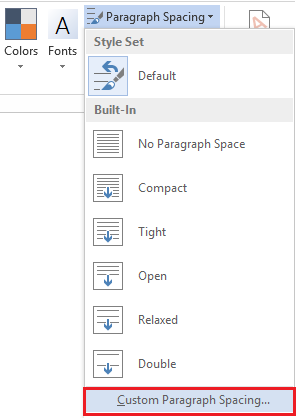
2.Under DESIGN, select Paragraph Spacing. 
3.Here, you have a few built-in options from which to choose. You can pick one of those and skip ahead to Step 5, or you can create your own, as we will in this tutorial. Select Custom Paragraph Spacing… from the drop-down list. 
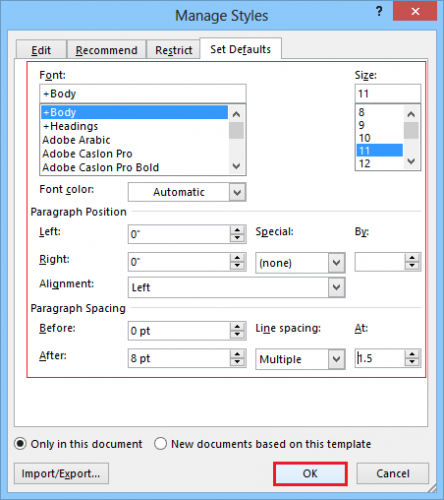
4.Make sure that the Set Defaults tab is selected, if it is not already. You can adjust everything from font and font size to paragraph position and spacing. Adjust these settings to your desired style, and then click OK. 
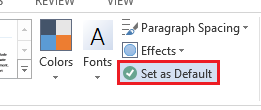
5.Finally, click on Set as Default under Paragraph Spacing. 
From now on, every document you put together will use your personal settings. If you eventually need to change them or revert to the original, you can always follow Step 3 and select the default style set.


