By default, a Word document is always set up with the same alignment, indention, and spacing settings. Even though it is possible to change the format manually while editing a document, it is a good idea to set your frequently used format setting as the default. This will help you save time for other tasks.
Word offers flexible options that allow you to customize the default alignment, indentation, and spacing settings. You can set the default format for each document or documents that are based on the same template.
1. Launch Word 2013 from your desktop.
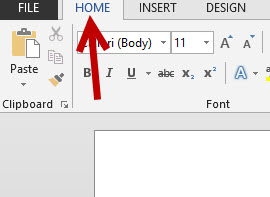
2. Once Word is loaded, make sure that you are currently in the Home tab. If the program’s ribbon is hidden, clicking on a tab name will show it.
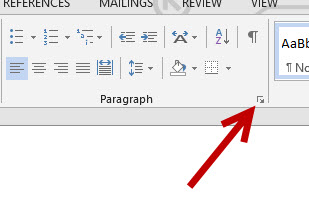
3. In the Home tab, look for the Paragraph… group, and click the small Settings button to access more advanced features.
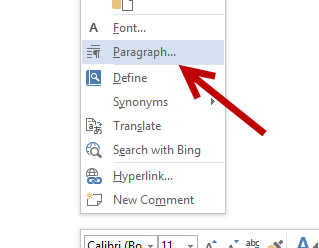
Alternatively, you can right-click on an empty space in the document, and choose the Paragraph option from the context menu.
4. In the Paragraph Settings window, go to the Indents and Spacing tab.
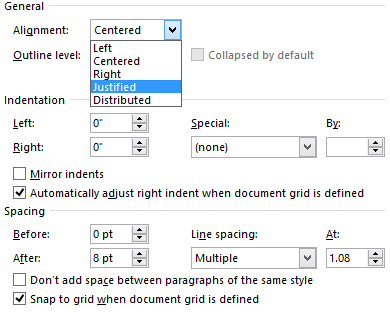
To change the alignment, find the Alignment option, and choose one of the available choices: Left, Centered, Right, Justified or Distributed.
The Indentation and Spacing options can also be found in this tab. Tweaking the settings are rather straightforward. You can use the arrows to increase and decrease the value, or you can manually type your desired numbers in the boxes.
5. As you start tweaking the settings, use the Preview box to see how a paragraph will look with the current settings. Finally, click the Set As Default button to save the change.
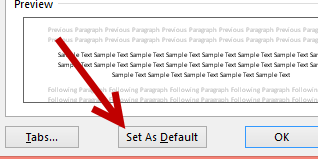
The program will ask if you want to apply the change to the current document only or all documents based on the same template. Choose your preferred option, and click OK.

From now on, your document will be aligned to your preferred alignment by default. You can, however, change the setting manually at any time.


Thanks for this.