A common issue when you save edited images from a PowerPoint presentation is that the program actually saves the edited version, not the original one. This problem may make editing the image the way you want nearly impossible. Luckily, PowerPoint offers a feature that allows you to extract original pictures from slides easily.
Below is an example of how extracted images look using the two different save functions.
The image on the left was saved using the normal save option. The image effect, border, and shadow are still preserved in the extracted file.
The one on the right was saved using the Save Original function. All additional effects have been removed, and the image was saved in its original resolution.

Please note that extracting the original image is only useful when you want to use the image in another program. If you use the image in another presentation, just copy it over and edit the settings you want. The picture will change according to your tweaks.
The steps in this tutorial apply to PowerPoint 2010 and above.
1. Launch PowerPoint, and open the document that contains images you want to extract.
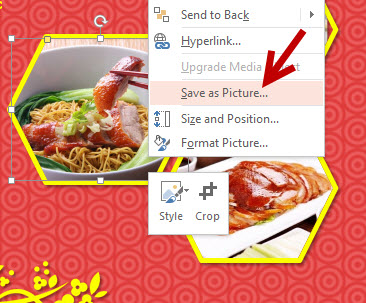
2. Navigate to the desired slide, right-click on the edited image, and choose Save as Picture.

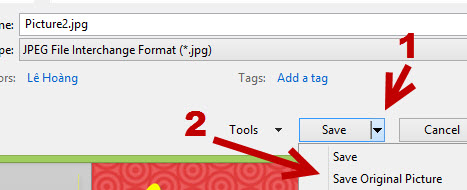
3. In the new Save As window, navigate to the location where you want to save the original file, give your new image file an appropriate name, click on the small arrow next to the Save button and choose Save Original Picture. Once you click the button, the window will be dismissed, and the program will extract the original image for you.

4. If you have to extract several images, this process may take time as you may have to do it manually one by one. Extracting the original version of multiple images at once is not possible.

