In Outlook, emails are displayed on a white background without any line separators between them. This makes finding and managing emails difficult. Fortunately, by changing Outlook’s default settings, you can enable the grid lines option. This will improve visibility by allowing you to differentiate between email items more easily.
Please note that the screenshots from this tutorial are for Outlook 2013. However, the steps will also work for previous versions of Outlook.
1. Launch Microsoft Outlook.
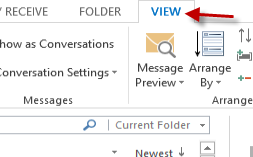
2. Switch to the View tab from the ribbon.
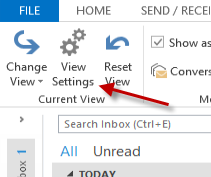
3. When you are in the View tab, select the View Settings button.
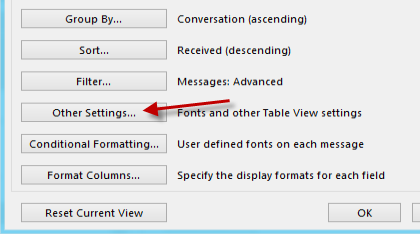
4. The View Settings window appears on the screen. Choose the Other Settings option from the list. This option will let you change the fonts and the table view settings.
5. Find the Grid Lines and Group Headings section, and change the grid line style to either Small dots, Large dots, Dashes or Solid.
6. When you are done, click the OK button at the bottom of the window to save the settings.
7. Outlook will now display the line separator between emails. Below are screenshots of the various grid line styles.
Without grid lines
Small dots
Large dots
Dashes
Solid:
If you have any problems, please just drop us a note about this tutorial in the comments below.


