Including a signature in your emails is a great way to share essential information such as your phone number, address, and social network information.
When I first started my business, one of the first recommendations I received was to place my contact information within my Outlook signature. The people you email are typically your best contacts for creating business.
In the corporate world having a significant amount of identifying data within the signature is highly recommended as well. This allows people to quickly identify to whom they are communicating.
1. Launch Outlook 2013.
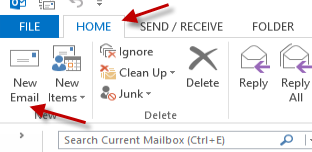
2. Switch to the Home tab if it is not your current tab and click the New Email button.

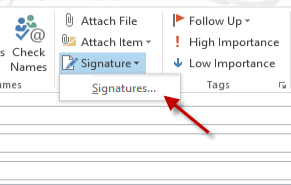
3. Once you are in the Email compose window, find the Signature option in the Include group. Then click the small arrow next to the text and choose Signatures…

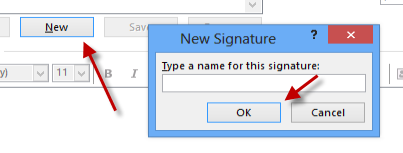
4. Clicking the Signatures option will bring up a new window which allows you to create and manage signatures for existing accounts. To create a new signature, click New. Give your new signature a name and then click OK.

5. As the program creates a new signature, the edit section will become available. You can use this section to add your information. Most of the styling options are easy to use if you are familiar with word processing software. In addition, you will have the ability to add your business card or link to your website within the signature area.

6. Once you have finished editing, hit OK to save it.
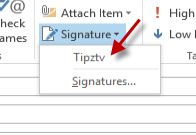
7. To add the signature to the email, go back to the email composer, choose the Signature option and then choose the name of the signature.


