In this Tech Recipe, we will deal with everything there is to know about wrapping text in excel. We will discuss why this little gimmick is handy. Furthermore, we will outline a step by step process to help you format your disorderly text in a matter of seconds.
Wrapped Vs Unwrapped text in Excel
So, what’s the difference between these two?
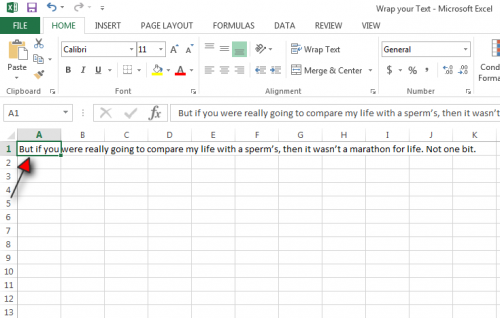
Well, the unwrapped text is a linear text that runs across an entire excel worksheet and takes the space of other cells. Here’s an example:

See, how it makes the entire worksheet look like a muddled mess. I wouldn’t want to work with a text that splays its entire body on the Excel worksheet like a sumo wrestler.
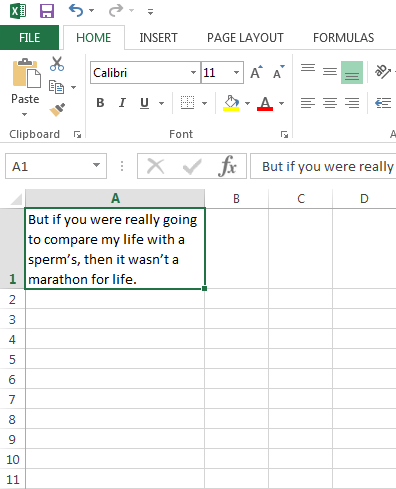
Fortunately, there’s a simple fix for this. We can wound this entire text vertically in a single cell. And that’s essentially what wrapped text is. Here’s what it will look like after this treatment.

So, how do you go from wrapped to unwrapped text? Let’s break it down into a step-by-step process to help you better understand.
Step by Step: Wrapping Your Text in Excel
1. Open your Excel Worksheet.

2. Select the cell containing the unwrapped text.

3. In the Home tab (your top left), tap Wrap text.

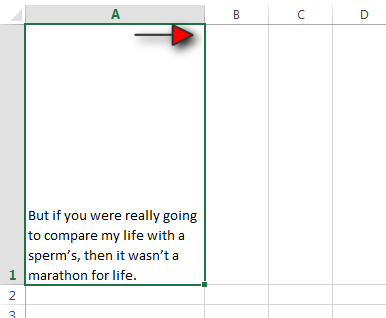
4. Your text will reshuffle, but it’s not properly adjusted yet. Increase the width of your cell to further accomodate it.
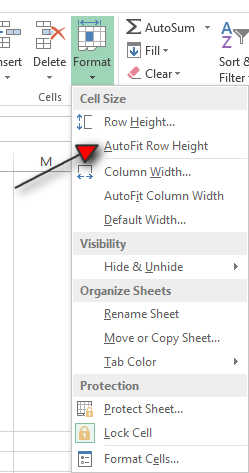
5. Now, select Format >AutoFit Row Height from the same Home tab.

6. Your text will finally wrap itself properly after the last selection. It will assume this final appearance.

And that’s how simple it is to condense and structure your expanding text in Excel.
Note: There are other methods on Youtube and Blogs, but this is by far the shortest and easiest of the lot. So, adhere to it to ensure that you can achieve maximum productivity as an Excel specialist. Time is a valuable commodity. Every second saved will make a hell of a difference.
Video Tutorial: Shortcut Key for Wrapping text
If you’re the type of person who has a limited attention span and can’t follow text instructions, you can also watch this Youtube tutorial, delineating the same process as above. It’s a bit different but equally effective and short. It involves justifying your text to wrap it.
Here’s a summarised transcription.
1. Select the cell with the unwrapped text.
2. Press Ctrl + 1.
3. Switch to the alignment tab.
4. Press Alt + J, then H and hit ENTER.
Easy peasy!
For more Excel help, check out these related Tech-Recipes.

