Along with the Windows 10 Start button comes an improved Start menu. The classic feel of the Start menu has been retained and sprinkled with a modern look from the application tiles on the right side of the interface. By default, some application tiles are larger than others to give emphasis to those applications that Windows considers essential. However, what is important to Windows may not necessarily be important to you. Windows recognizes this and allows you to resize the application tiles. Customizing your Start menu with the tile sizes that you prefer for each application icon is simple. This article will show you how.
How to Change the Size of Application Tiles in the Start Menu on Windows 10
To make application tiles bigger or smaller, follow the procedures below:
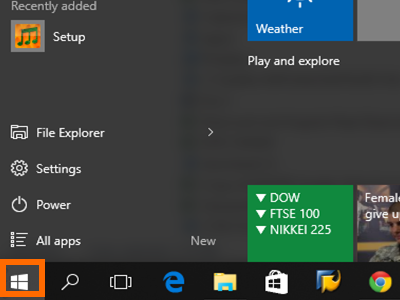
1.Open the Start Menu by clicking on the Start Button in the lower-left part of your computer’s screen.
2.In the Start menu, you can see the application icons on the right side of the menu. Choose the application tile whose size you want to change.![]()
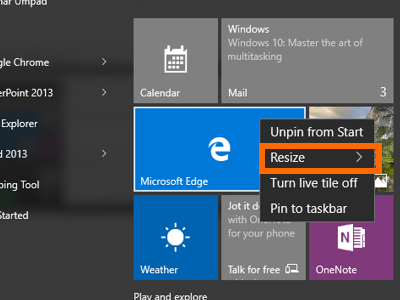
3.Right-click on the chosen application tile to view available options.![]()
4.Hover the mouse pointer on Resize to highlight the option.
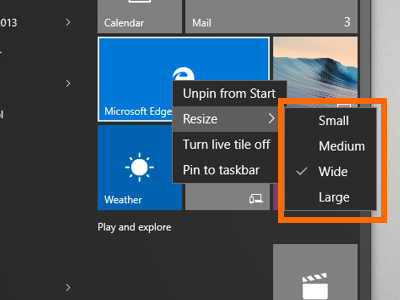
5.Sub-options for resizing will be displayed. Choose between the available sizes by clicking on an option: Small, Medium, Wide, or Large.
6.The selected application icon is now resized. The action may cause other application tiles to move to adjust to the chosen tile’s new size.![]()
Do you prefer smaller icons over the larger ones? How is your Windows 10 Start menu arranged? Show us your personal menu. If you have any concerns with the steps above, drop us a message in the comments section.
