Today we live in times where the personal computer plays a huge role in our daily lives. With that there are examples where one person or family has multiple devices at home and often find themselves in situations where they need to transfer files from one device to another. A similar situation is with multiple people in an office. In the past transferring files had to be done either by mail, or some cloud storage or even by USB or a LAN cable. With the release of Windows 7, Microsoft implemented a feature called Homegroup.
A Homegroup is a group of devices running Windows (7 or up) on the same network. The idea behind this feature was to enable users to share files between different devices without having to be physically there. You can get a movie from your desktop in your office room to your laptop in your bedroom. All you need is to have both devices turned on and connected to the same network.
How to set up and join a Homegroup on Windows 10
In order to create a Homegroup first you will need to set your network type to Private. This is usually done when you connect to a network for the first time, but it can be changes afterwards.
1.Click on the Windows logo on the left of the taskbar or hit the Windows key on your keyboard.
2.Open Settings through the gear icon on the start menu.
3.Navigate to “Network”
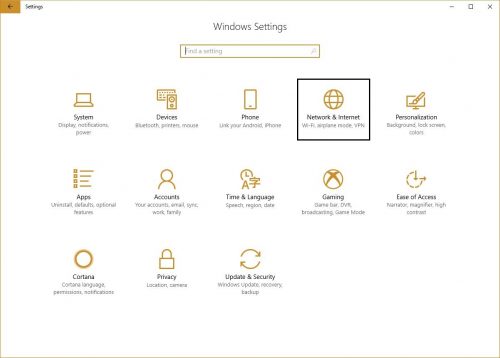
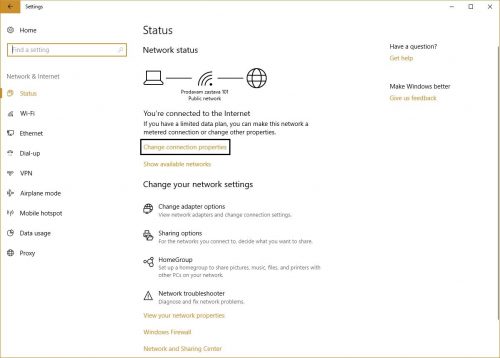
4.Click on “Change connection properties”
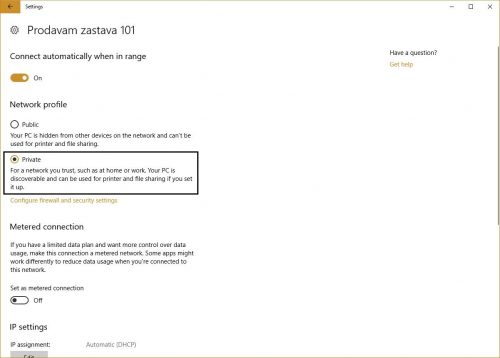
5.Make sure that the network is set to “Private”
6.Go back to the previous menu
7.Click on “Homegroup”
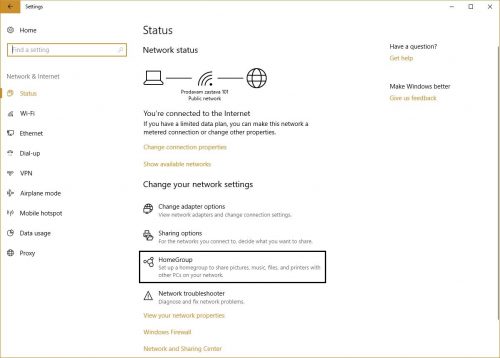
A new window will open where you will have several options. If your network doesn’t have any Homegroups it will say “There are no networks on the network”. If a Homegroup was created by another computer you will be prompted to connect to it.
8.Click on “Create a Homegroup”
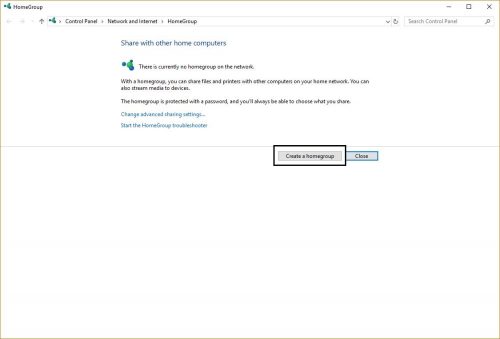
9.A new window with some general information will open, click on “Next”
10.Next you will have the ability to share the files that you would like, as well as printers and other devices that allow to be shared on a network.
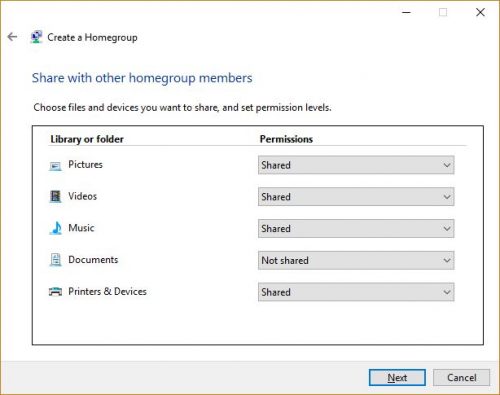
11.Click “Next”. Note: this process may take a few minutes to complete.
12.Write down the displayed password
13.Click “Finish”
The next couple of steps will need to be completed on the PC that you want to have connected to the Homegroup.
14.Click on the Windows logo on the left of the taskbar or hit the Windows key on your keyboard
15.Open Settings through the gear icon on the start menu
16.Navigate to “Network”

17.Click on “Homegroup”

18.Windows will inform you that there is a Homegroup on the network, so you will need to click on “Join Now”
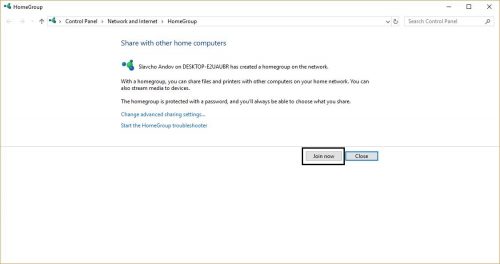
19.A new window with some general information will open, click on “Next”
20.Next select the folder that you want to share with the Homegroup, files, printers and other devices that allow to be shared over a network.
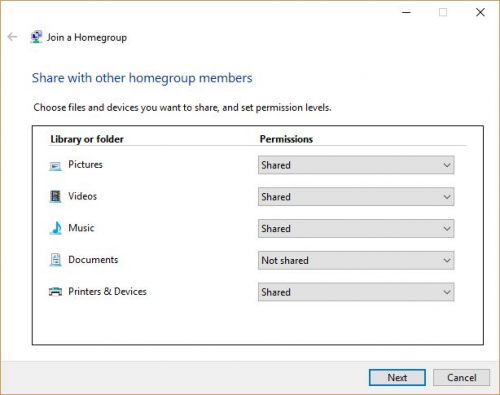
21.Enter the password that you wrote down in step 12.
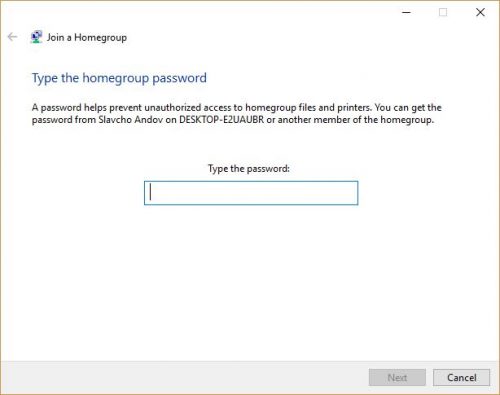
22.Click “Next”
23.Windows will inform you if you are connected to the Homegroup
24.Click “Finish”
When you need to access certain files on another device all you will need to do is open up the File Explorer and from the left navigation tree under the “Homegroup” section. There you will see the name of your Microsoft account and under the name will be the device that you just joined to the Homegroup.
Frequently Asked Questions and Answers
Q: Can I add more than one computers to my Homegroup?
A: Yes, you can add as many as you want and need. For every computer that you want to add to the Homegroup just complete steps 14 to 24.
Q: Can I share other files with other computers?
A: Yes, navigate to the file or folder that you want shared on the network. Right click on it and under the menu “Give Access to” select if you want the file or folder to be share so that other people can only view it or view and edit it.
Q: Can other people on the internet view my files?
A: No, the files shared with the Homegroup are only available to the people that are logged on your network (WiFi or LAN) and are joined on your Homegroup (have the Homegroup password)


