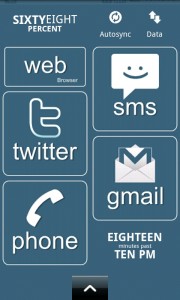
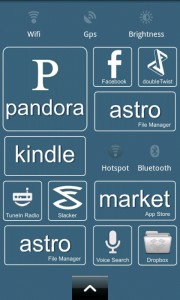
Desktop Visualizer is an Android widget that creates shortcuts with a specified image or icon of an application for your home screen. It integrates well with all popular launchers like LauncherPro, ADW Launcher, and the default android launcher. By being able to use any image, you are only limited by your own imagination in customizing your home screen.
Before beginning your customization, you need to download and install Desktop Visualizer from the Android Market. You can either search for it at the Market or use the following QR Code:
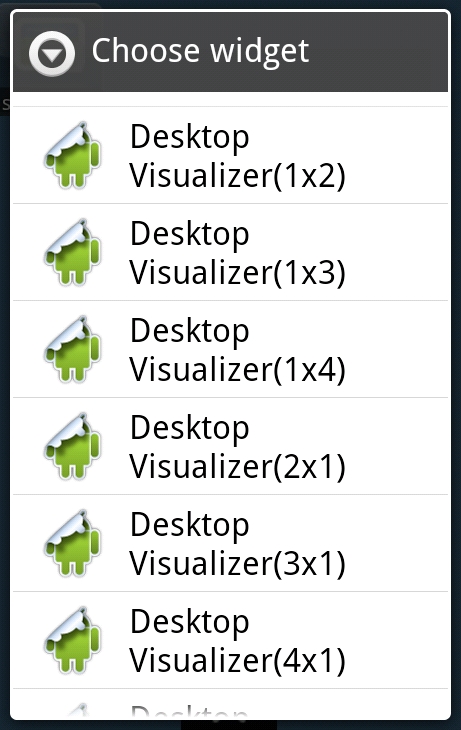
After downloading and installing the widget, it is a good idea to play around with it a bit to get familiar with how it works. Longpress the homescreen, select Widgets and scroll down the list until you come to the list of available Desktop Visualizer widgets. Sizes are 1×2, 1×3, 1×4, 2×1, 3×1, 4×1, Large, Middle, Small SS, and Small. Large is 3×3, Middle is 2×2, Small SS is the size of your original icons, and Small is a larger 1×1 size.
You need to figure out what applications you will want to be placed on the home screen. After compiling your list, you need to establish a gameplan for how you want to design your screen. Do you want to use large icons that are easy to find, do you want to go for a completely off the wall design, what is the look that you are trying to capture.
Download your images to your computer and once you have them all collected, place them in a folder with a name for your new “theme”. Now you can move them to your Android device using whatever method you normal use for moving files, Dropbox is an excellent app to use for projects like this. Once the images are on your device, you are ready to start building your new interface.
Longpress the homescreen, select Widgets, and scroll down to the proper sized Desktop Visualizer widget. Tap the Select Icon button, select Image File, choose what you will use to find the image, (mine allowed me to choose between Gallery and ASTRO) and browse your device to the desired image.
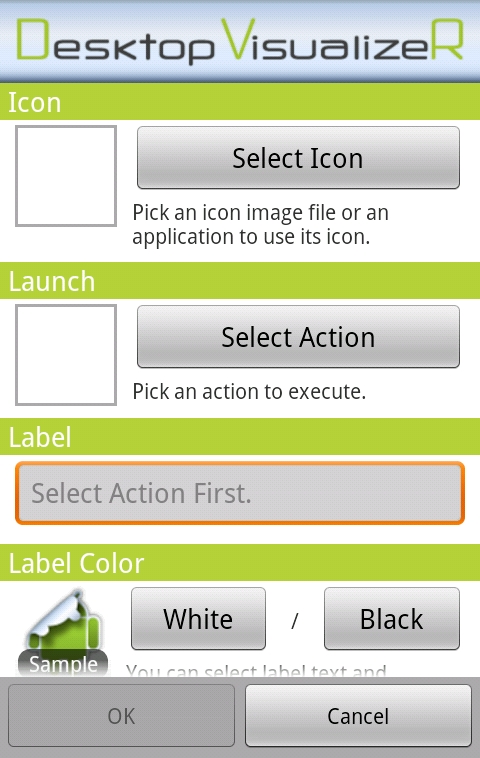
Next, tap the Select Action button. You can choose from Launch Application, Other, or None. Other allows you to select from items such as Contact, Direct Dial, Direct Message, Directions & Navigation, Music Playlists, Settings, Activities (ADW Launcher), Dropbox folder, etc. None is useful if you want to have labels on your home screen that have no other function but to segregate icon groups.
If you want your shortcut to have a label you can use the one that will populate in the Label textbox when you selected the Action or you can edit the label to something more to your liking. You then need to use the Label Color buttons to pick the label text and label background colors. Another option is to delete everything in the Label textbox and have no label at all.
Lastly you select what color you want for the Touch Effect which is the color that highlights the icon when it is selected.
Select the OK button and your widget will be created. You repeat these steps to complete the creation of your interface as needed.
If your design leans towards a more generic look, you can easily find logos and icons at Google Images that you can use to represent your applications. If you are looking for something more rare, you will need to create them yourself by using an application such as Photoshop, Gimp, Corel Photo-Paint, etc. Before working on your images, it is wise to create templates for the various sizes that you will use. Create some blank images and see if the appear on your device in the way that you desire. I used 175×175 pixels for my 1×1 icons, 355×175 for the 2×1 icons and 355×355 for 2×2 icons. Once you have created and saved your templates, you are ready to create your custom icon images for your interface. You will still compile them into a folder and copy them to your device. Follow the same steps as above to create the widgets. The sky is the limit when it comes to how your interface will look, don’t hesitate to experiment and play around with different ideas. You can find other widgets for clocks, calendars, system information and controls that will probably work well with your new interface, you just have to do a little hunting at the Android Market.
Here’s how Nexus One’s home screen looks now:
I used Desktop Visualizer for all shortcuts, Extended Controls for my settings (Bluetooth, Wifi, data network, etc.), BattStatt, Tajm (clock).

