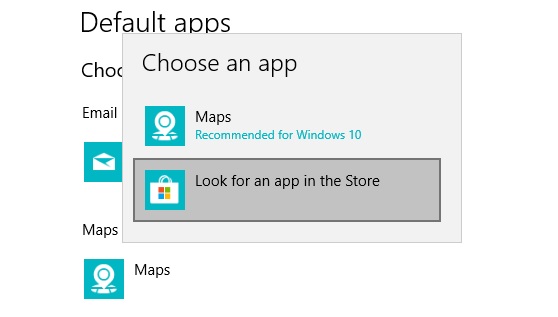
Windows comes with many default features and apps. Until some time ago, most of us went by thinking such default feature and apps cannot be removed. This would be particularly…annoying, when one faced problem(s) with a default setting and it needed uninstalling and restoring. Thankfully, we now know of an easy, quick fix to get around problems in default apps. All you need is Windows Powershell…another feature present in Windows 10 by default. Lucky for us, Windows incorporated internal fixes for its own problems. So, keep reading to find out how to uninstall and restore built-in apps in Windows 10.
Uninstalling and Restoring Built-In Apps in Windows 10:
1. Go to Start menu from the Windows icon.
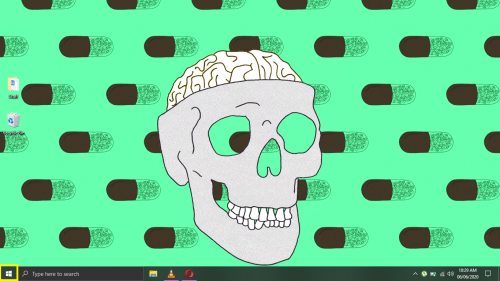
OR
2. Type in ‘powershell’ in the Cortana search bar > Run as Administrator.
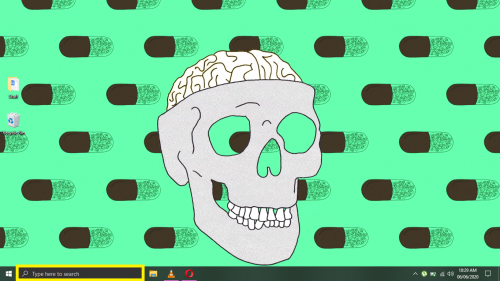
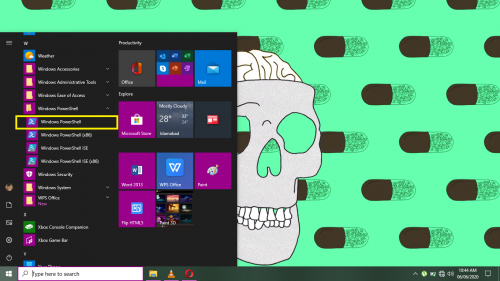
3. Scroll down to Windows Powershell under the W category of apps.
4. Click on the downward arrow in front of Powershell.
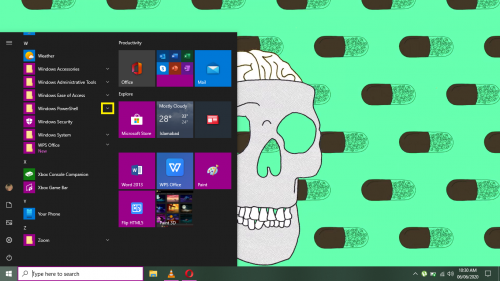
5. Select Windows Powershell from the dropdown menu.
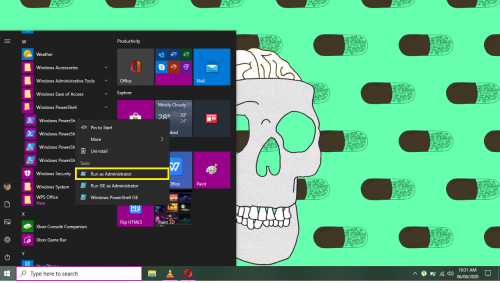
6. Click on Run as Administrator.
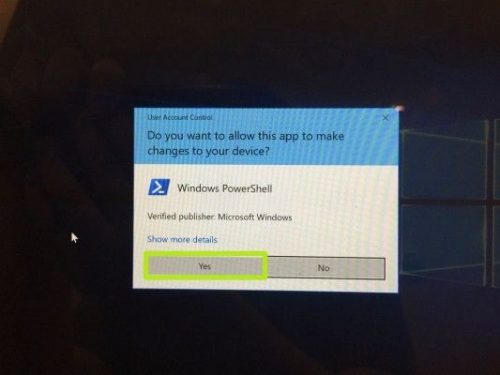
7. Select Yes from the prompt that pops up next.
8. Type in the required command prompt in space highlighted below.
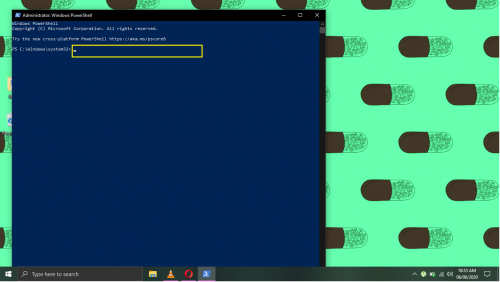
9. Hit Enter.

The default app(s) has now been successfully uninstalled and removed from your Windows 10 device.
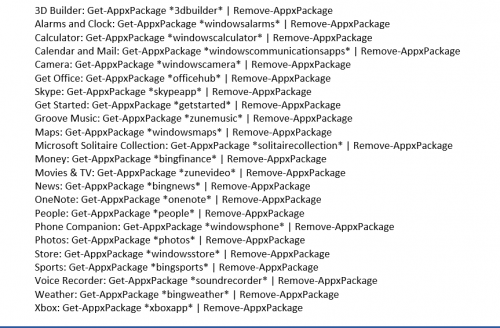
List of Command Prompts for Uninstalling Default Apps in Windows 10:
There are many default apps within Windows 10. Following are the command prompts you need to enter in Windows Powershell to uninstall a default app. Following is a list of command prompts for uninstalling pretty much every default app that comes in Windows 10.
Part 2: Restoring Uninstalled Default Apps in Windows 10 – Method 1:
This method involves use of Windows Powershell.
- Follow steps 1 to 7 as mentioned above.
- Type the following command prompt:
Get-AppxPackage -AllUsers| Foreach {Add-AppxPackage -DisableDevelopmentMode -Register “$($_.InstallLocation)\AppXManifest.xml”}

- Hit Enter.
The apps you uninstalled are now back and restored in your Windows 10 device!
Part 2: Restoring Uninstalled Default Apps in Windows 10 – Method 2:
This method does not involve the use of Windows Powershell, but of Microsoft Store instead. Just go to the Store and install the default app(s) you uninstalled using Powershell.
And that is how you uninstall and restore built-in apps in Windows 10. So long as you can run Windows Powershell successfully.
Things to Keep in Mind Before Executing Powershell Command Prompts:
Whichever method you choose to restore default app(s), make sure to not have any other app or program running other than Powershell while restoring.
The cache and storage data related to an app is removed from your device automatically once you hit enter in the command prompt.
The option to uninstall default Windows 10 apps through Powershell is not the same as ‘repairing’ or ‘restarting’ a default app from Windows 10 app settings. Some bugs and issues that might be present in default apps only go away once you completely uninstall that app. That is where Powershell saves the day!
Other Useful Windows 10 Tips and Tricks
The following tips and tricks related to common Windows 10 features might help you, too:
Block an Application from Accessing the Internet in Windows 10
Turn On and Off Automatic Updates in Windows 10
How to Use Windows 10 Automatic Repair

