This article is a continuation of our first article How to Use Microsoft Planner, The Best of its kind (Part I). Microsoft introduced one of it’s finest and the most useful products called MS Planner back in 2016. A planner enables users and teams to create plans, assemble and assign tasks, share files, communicate and collaborate with other users, and receive progress updates via various means on the Office 365 platform. Each new plan created in Planner automatically creates a new Office 365 group.
Microsoft Planner’s best feature is that you can link the planner to Microsoft Teams. Teams need a schedule and more than anyone else. So while you start a project on MS Teams you can add an MS planner tab. The Planner tab will help you link a planner to your project. To your team, you can assemble and assign tasks, share files and much more. We have covered MS Teams in our previous Tech-Recipes. Check these out.
How to Add Microsoft Planner Tab in Microsoft Teams Project
How to Make the Most of Microsoft Teams Calendar
Start a Conference Call on Microsoft Teams
How to Start a Project on Microsoft Teams
Since in part I of this Tech-Recipe we discussed how you can add a plan and assign it to a team. This part will cover what more you can do on the MS Planner.
Other Features of Microsoft Planner
1. Click on Board to see the task that you have assigned. Also, review people whom you have assigned the task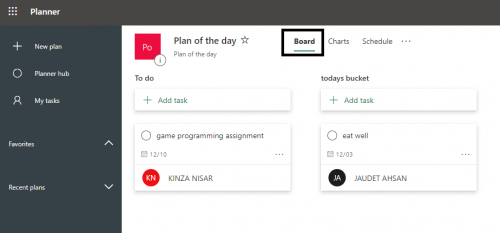
2. Click on Chart to see the complete statistics of tasks, not stated, done, in progress, late and completed.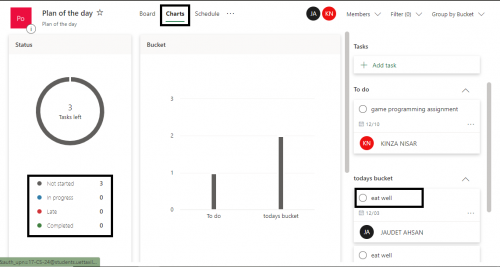
3. Hit the schedule tab to see your plans marked on the calendar. You can even edit and add new plans on the calendar. You can also review the completed tasks and bucket lists from this tab.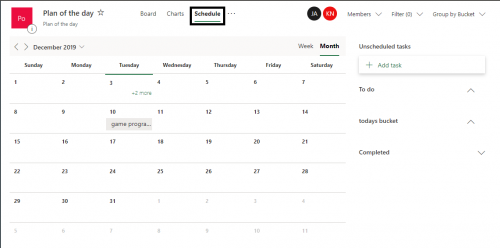
4. To add a task using the calendar click the little + symbol and give a description of the task as before.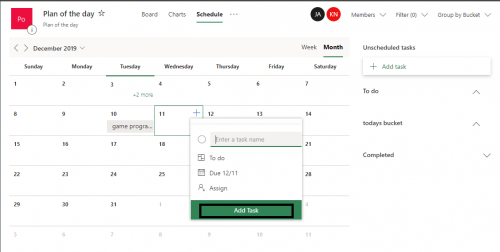
5. Click on the planner hub to see all plans and mark favorite ones.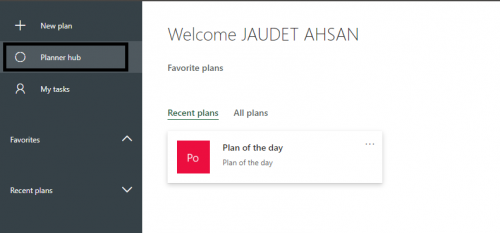
6. In my tasks tab, you can make plans for your self. The plans that you’re not sharing with anyone are present in this tab. This tab also shows the completed, not started and in progress tab.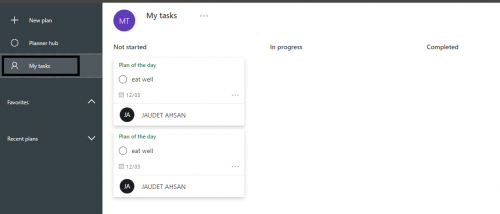
And that’s it on Microsoft Planner.
Check out other tech-recipes.
Five WhatsApp Status Tricks that You Need to Know
How to Create a WhatsApp Group Where Only Admins Can Message.


