SQL Server database project imports multiple database objects from a single/ multiple databases under one visual studio solution. Generally, converting all database objects into .sql files and bringing them under a solution & version control. Database objects include tables, schemas, stored procedures, views, etc.
Without having SQL server database under database project & version control is cumbersome in the multi developers’ project. Imagine your changes to a stored procedure getting overwritten by some other developer. This problem arises when we do not have a version control & shared development environment.
Introduction – Database project
1Import multiple database schema/objects within same solution
2Converting database objects (schemas/ tables/ stored procedures) into .SQL files
3Manage database changes under a shared development environment & version controlManage > Develop > Deploy
Benefits of Database Project
1Database under source control
2Compare schema and data before deployment
3Easy development & deployment to Dev > QA > UAT > Production
4Single database can be deployed to multiple servers
5Eliminate errors while building the database solution, avoid bad code getting promoted
6Code refactoring – saviour
7Continuous integration & Continuous Deployment (CI & CD)
Prerequisites / Requirements
Visual Studio 2012 +
SQL Server Data Tools (SSDT)
SQL Server 2012+
Coupled with benefits and ease of database project. Furthermore, we will learn how to create a basic database project for a single database in visual studio. In this tech-recipe post, I am using visual studio 2017 (SSDT) to create a database project. You may use any version starting with visual studio 2012 to set up.
How To Create Database Project In Visual Studio
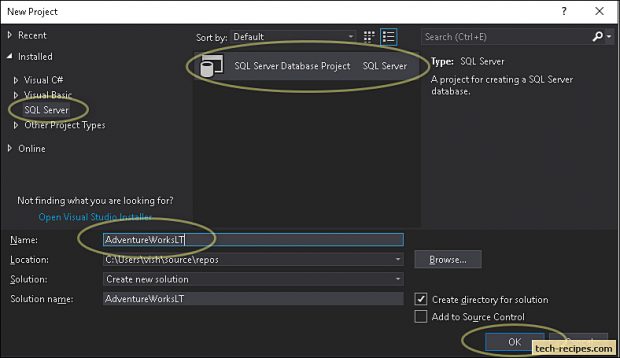
1.Navigate to visual studio and create a new project, File > New > Project.
2.On the new project tab, in the name box, enter the database project name and click OK.
 Under solution explorer, an empty solution & project is created as AdventureWorksLT.
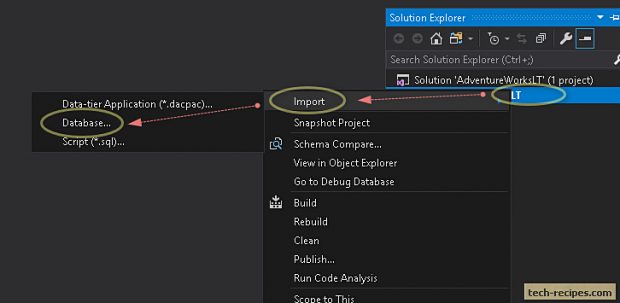
3.Right-click on AdventureWorksLT project name and navigate Import > Database. Selected database objects will be imported under this project.
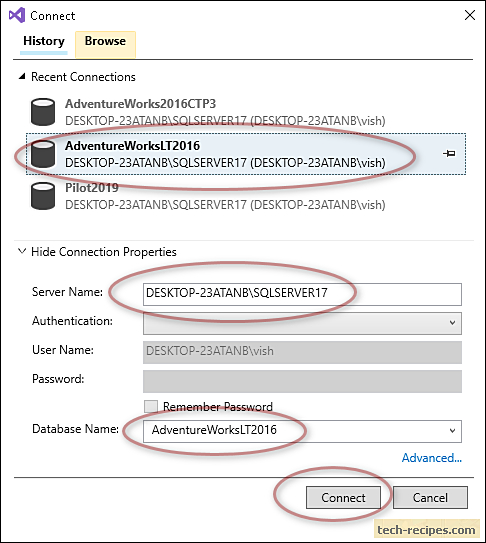
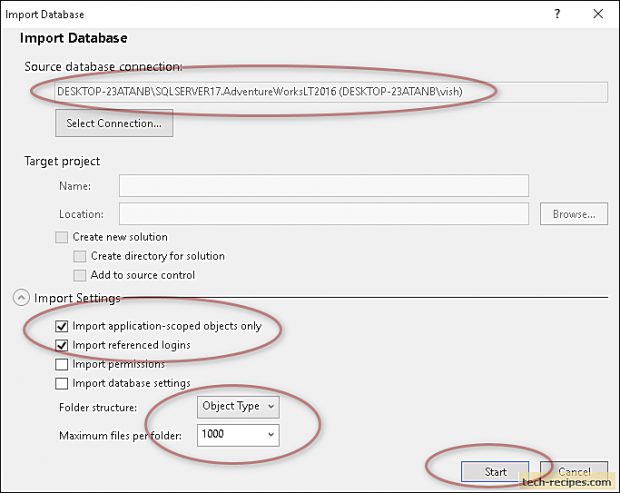
4.On import database tab, select connection to a database, by default windows auth is selected. You may specify SQL server auth as per your requirement. Furthermore, select folder structure as per requirement. Here, I have selected as Object Type which segregates all objects by their type, tables, views, stored procedures under different folders. Click on start.
Schema – Classify database objects as per their schema in a different folder based on schema name.
Object Type – Classify database objects as per their type. Likewise, a different folder for tables, views, stored procedures.
Schema\Object Type – Import of database objects as per their schema and object types. For e.g all Sales related procedures, tables, views under the Sales schema folder.
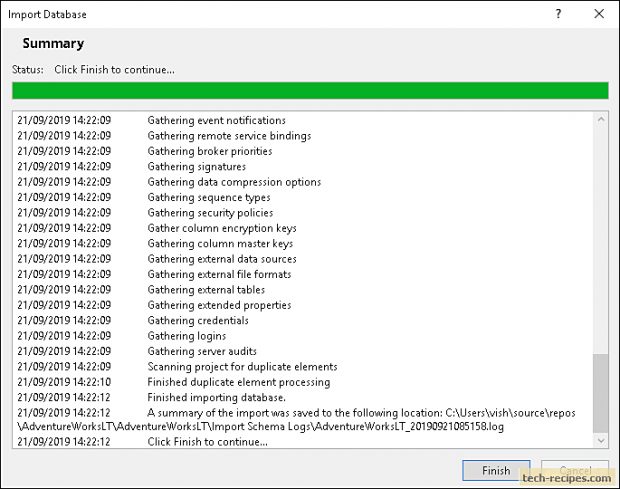
5.Import of database objects has finished.
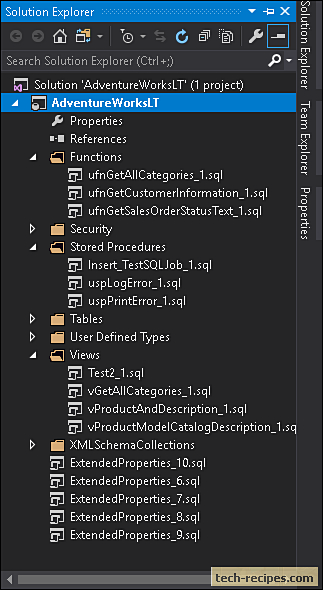
6.Navigate to solution explorer, and expand each object type folder. You can see .sql files created for each object in database.
We can create a dacpac file based on this database project and deploy all the objects to another database server.
Summary
As a result, we have learned to create a database project in visual studio (SSDT). Next series of article covers more on deployment and getting database project under version control. If you like this post then browse through Tech-Recipes database archive posts to learn more useful stuff.

