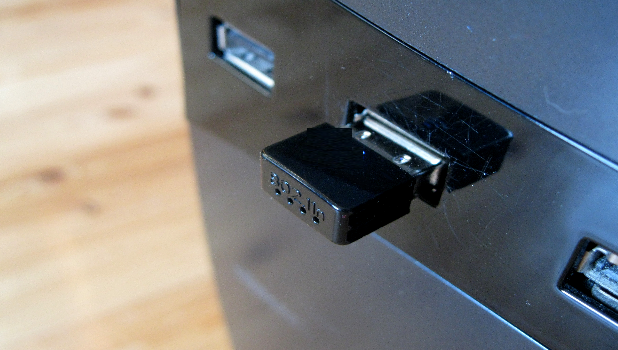
USB and external hard drives need to be safely removed before you can pull them from the USB ports. Sure, you may have had experiences of plugging in and out your USB drivers without any issues, but it’s only a matter of time before you run into problems. Removing external storage drives without the proper procedures will shorten the device’s lifespan. This article will teach you how to unmount a drive to remove a USB storage device. safely
Personal computers have come a long way in the recent pasts in terms of storages. But still, we do use portable USB drives for transferring some small files or use an external hard disk to store plenty of data. However, after we are done using it once we plug them in, a few of us don’t eject it and just pull it out. The trouble is that the data might get deleted doing that; so, for the data to not get deleted or lost, here’s how to safely un-mount your hard drive before removing it.
How to Unmount a Drive in Windows
To unmount a drive on your Windows computer follow these steps:
1. First off, you need to open the File Explorer. To do that, you can either open the Start menu and open File Explorer from there, or you can open it from the taskbar if at all you have got it pinned there. If you are on Windows 7 or Windows Vista, you should be opening My Computer. You can also open File Explorer through the Search function. 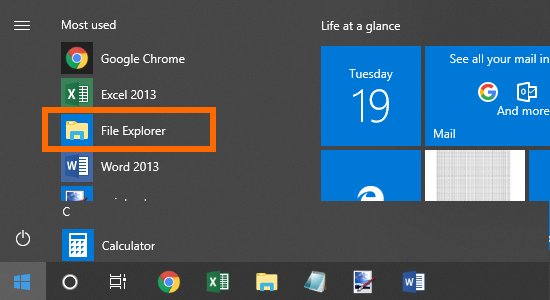
2. Click on the My Computer, This PC, or Computer. The list will be displayed on the left side of the File Explorer.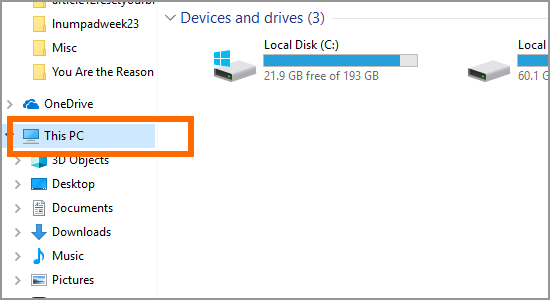
3. You will see all the drives that are active for your PC. The drives can be anything such as your internal hard drive or an external hard disk. Click on the drive that you want to unmount. You can un-mount any of the drivers that are listed in this section.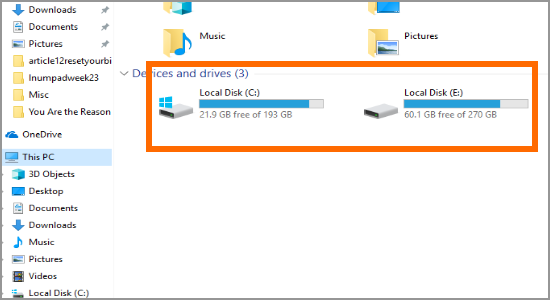
4. Click on the Manage tab in the top section of the File Explorer. If your version of Windows doesn’t have this strip, you can simply right click on the drive instead. 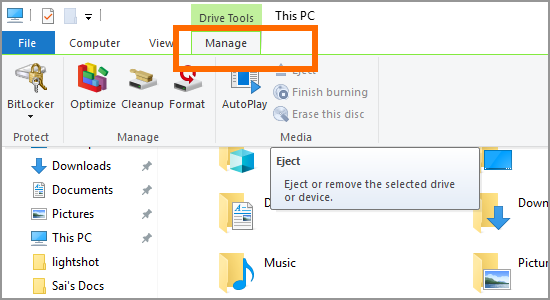
5. Now, after selecting the drive you intend to un-mount and select Manage, you can now click on Eject which you will find in the Media section to un-mount the drive. 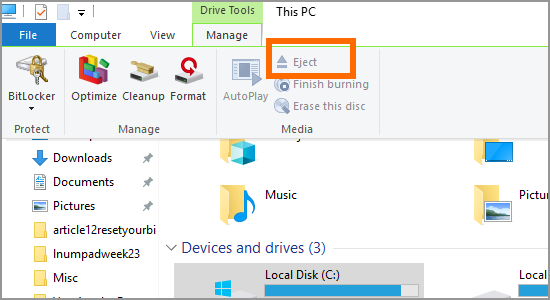
6. After you click on eject, you will get a notification that you can safely remove the hardware. And moreover, you won’t be seeing that particular USB drive’s icon in the list. 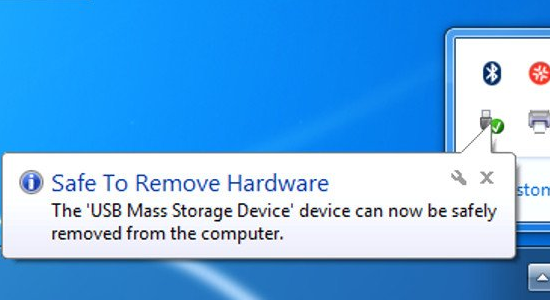
How to Unmount a Drive in MacOS
Coming down to the MacOS, it’s as easy as it is in the Windows with no hard turns. All you need to do is, open the Finder in your Mac where you’ll find all the listed hard drives to the left side of the screen. Now, in the list of the hard drives displayed, you can see an eject symbol towards the right side of the name for removable disks. You can click on the eject icon and un-mount your hard drives. 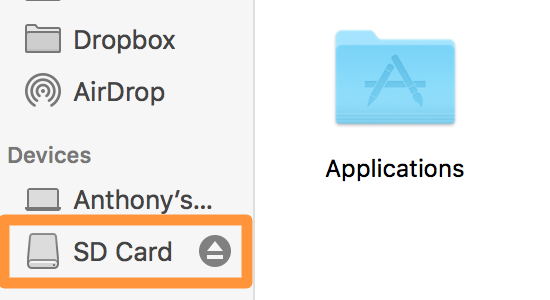
That is how easy it is to un-mount your hard drives on your PC. As said earlier, it’s for the own safety of the data that is in your hard drive.

