Apps running in the background on Windows 10 is not necessarily a bad thing. In fact, there are critical apps that need to be running in the background. Also, depending on your requirement, you may need some apps to be running in the background without you actively monitoring them. However, some apps are plain annoying and are power consumers and RAM eaters. This tutorial will teach you how to stop apps running in the background in Windows 10.
The apps we use daily on our PC run in the background sucking up our battery using the RAM. Even the apps in the Windows Store are designed in that way to run in the background. All this to send you out notifications and pop-ups about the activity for which you are using the app for. These Windows apps also take advantage of the OS to display live updates in the Live Tiles in the Windows Menu.
The issue as said earlier is the battery drain and the occupying of the CPU resulting in low performance. However, in the Windows 10, we have a lot of settings by which we can stop these apps running in the background. That said, we will have control over the apps we use in the Windows 10.
How to Stop All Apps Running in the Background in Windows 10
To stop all apps running in the background, follow the below procedure.
1.Click on Window’s Start Menu located on the lower-left part of your computer’s screen.
2.From the pulled up Start Menu, click on Settings.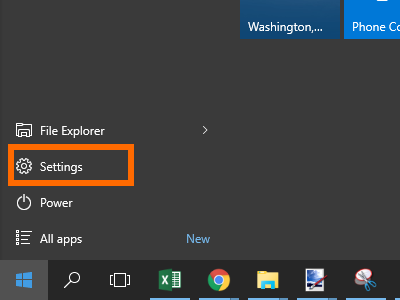
3.From the Windows 10’s Settings, click on the Privacy icon.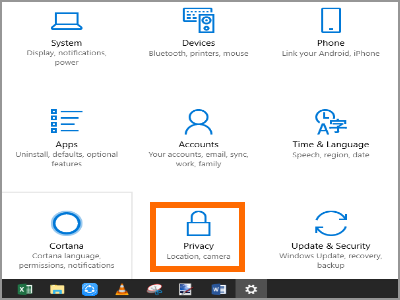
4.From the Privacy page, scroll down and click on the Background apps option.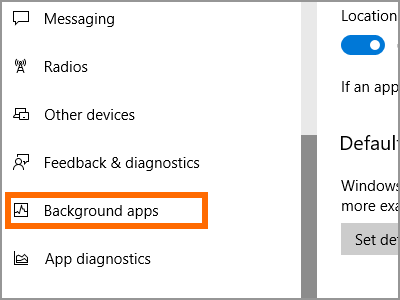
5.From the Background Apps’ page, tap on the toggle switch to enable or disable all apps from running in the background.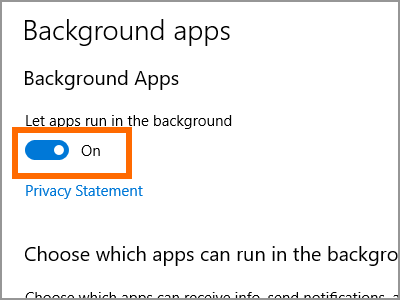
How to Stop Specific Apps Running in the Background in Windows 10
To stop all specific apps running in the background, follow the below procedure.
1.Click on Window’s Start Menu located on the lower-left part of your computer’s screen.
2.From the pulled up Start Menu, click on Settings.
3.From the Windows 10’s Settings, click on the Privacy icon.
4.From the Privacy page, scroll down and click on the Background apps option.
5.From the Background Apps’ page, tap on the toggle switch to enable or disable all apps from running in the background.
6.Scroll down a bit to see all of the Apps on your device are displayed.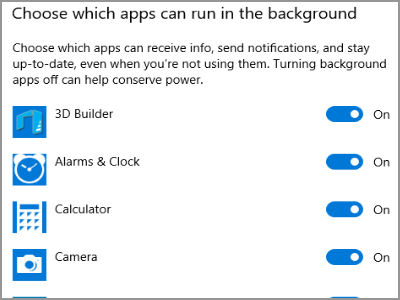
7.Tap on the toggle switch to the right of each app to enable or disable it from running in the background.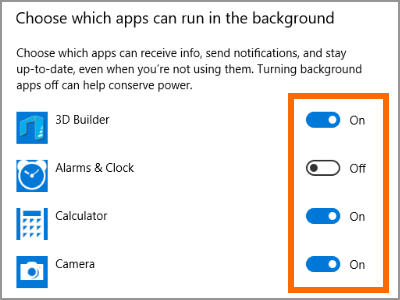
That’s it; the apps won’t run in the background now. Now, if these apps or some of these are important to you, you can let them run in the background but disable them if you want to by turning on the Battery Saver.
You can turn on the Battery Saver by clicking on the battery icon in the notification panel and click on the battery saver icon.
Done with the apps that we download from the Windows App store, the traditional Win32 apps that we install can also be running in the background based on the permissions given by you.
To do that, you need to close them down manually. But sometimes, even if you close them manually, it might be running in the background. To check if it’s running in the background, check the notification area icons. If you find the icon of the app that you just closed, just right click on the icon and click on exit. For example, uTorrents and many such apps run in the background even after closing them.
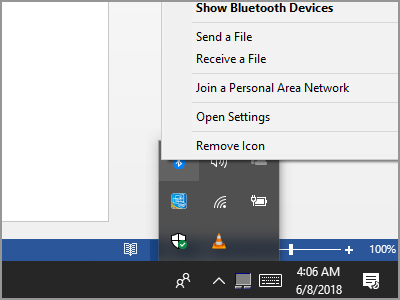
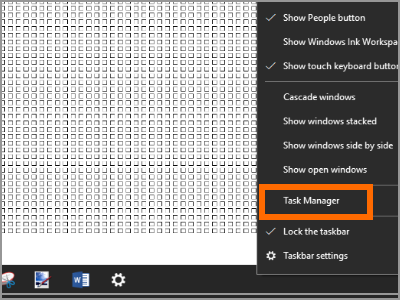
If you still are not able to exit the app, you can head over to the task manager by right-clicking on the Windows menu bar and then click on task manager.
After the task manager opens, find the task or app that is running in the background, right click on it and click end task. That’s it; you’re done.
You just learned how to stop apps running in the background in Windows 10. If you have questions about any of the steps above, let us know in the comments section.

