Instagram allows you to save posts for later reading. This is a neat way of helping people manage their time and data connection. At some point, the saved posts can turn into heaps that can cause clutter. This makes finding specific posts harder and time-consuming. Fortunately, Instagram now allows you to categorize saved posts into collections. This article will teach you how to create a Save Collection on Instagram.
You probably tried saving posts on Instagram to read it later on. Sometimes, you need to open each one to find a single post that you are looking for. That’s downright inconvenient, right? Aside from the inconvenience, seeing those cluttered saved items is just unpleasant to the eye. Instagram knows your struggles. Thus, with its latest version, you can group saved post according to their category. Would you like to set one folder for fashion updates? Set it up. News about your favorite Hollywood actors? Save them all!
How to Create a Collection Folder
To create a save collection on Instagram, you first need to create a collection folder. To create a collection folder, do these:
1. Launch your Instagram app.![]()
2. Go to your main profile by tapping the user icon. It’s on the right side of the heart icon from the option on the lower part of your screen.
3. Tap the ribbon icon or also known as the save button.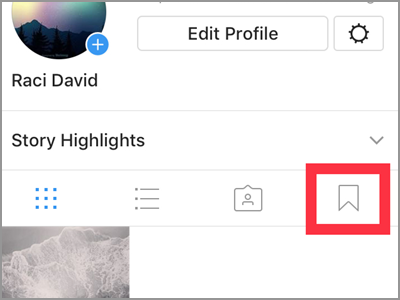
4. Go to Collections tab.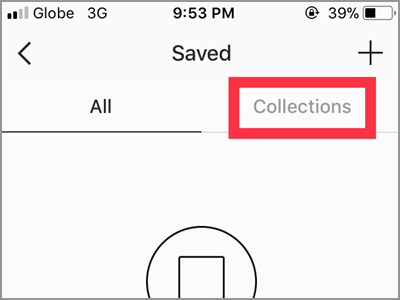
5. Create a new collection folder. For first-timer, you can click the Create Collection tab to easily add a folder. See below screen. You can also tap the + sign on the top right corner. Then select Create Collection on the next screen.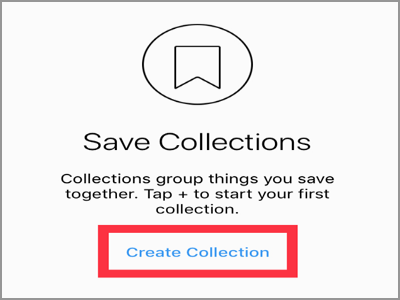
6. Put your desired title for the folder. I recommend to name it according to their content. Tap the Collection Name box and start typing.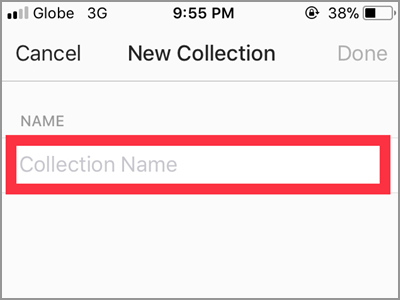
7. When you’re done with the name, hit the Done button.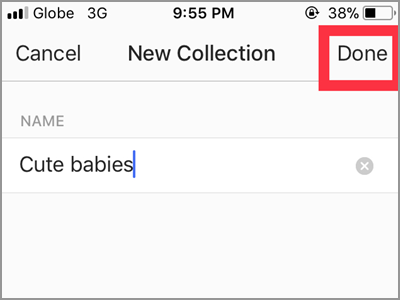
8. Your new saved Collection is now ready for any saved post you might want to add.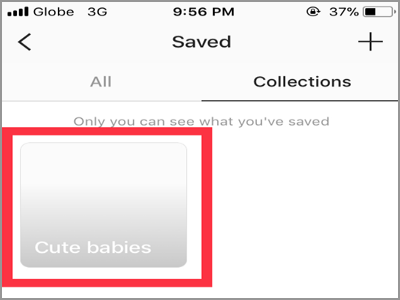
How to Directly Save Posts to Collection Folder
To easily direct save posts to a certain Collection folder, do these:
1. In the lower left corner of a post, you will see the ribbon or save icon. Instead of just tapping it to appear the Save to Collection banner, hold and press on it.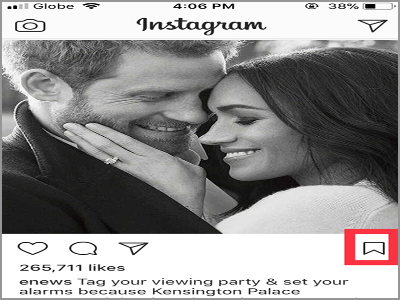
2. Then, choose the collection name you want the post to be saved and that’s it!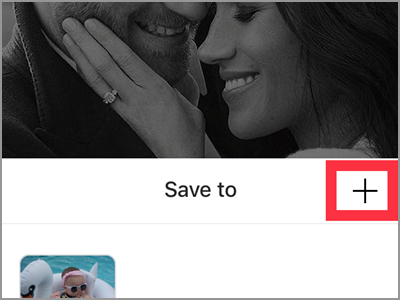
The second method can be used when you suddenly felt to create a different folder name on the post you’ve just seen.
1. Long press the ribbon icon.
2. The Save To menu appears. Tap the plus sign icon on the top right to create a new collection.
3. Enter the name of your new save folder.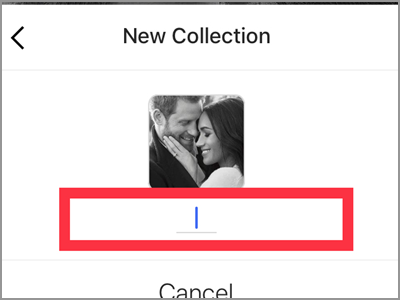
4. Then tap the blue Done button below.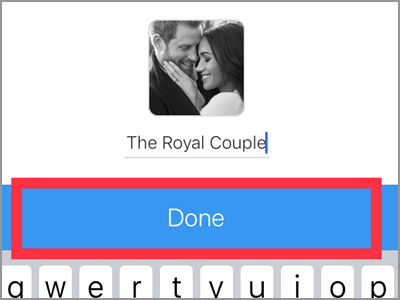
5. The upper part of your screen will show a confirmation that your post is saved to its Collection folder.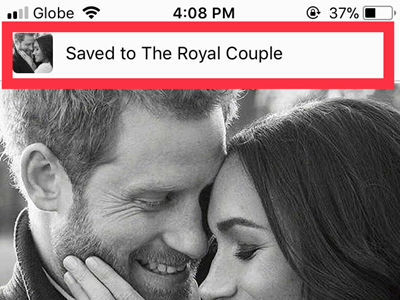
Frequently Asked Questions
Q: I already have so many saved posts on my account. How can I sort and put them in their designated collection all at once?
A: You’re lucky enough. Read the next sentences carefully and you can definitely solve such problem. First, open the collection name and tap the three dotted line in the upper right corner. Then, press the Add to Collection tab on the next screen. After that, put select every post you want to be included in that folder. Just tap the post to put a check mark. For the last step, click the Done button and the post is now in the folder.
Q: How will I know if I already saved the post?
A: There are two ways to know whether you’ve already had the post in your saved folder. The first one is by manually check for it on your Save folder. But the second and easiest way to determine is when the ribbon icon on the post turned black in color.
Now that you know how to manage your saved posts, you can now have more time on reading them and lesser time looking for them. Also, putting posts into Collections make the sorting process easy and more productive.
You just learned how to create a saved Collection on Instagram. If you have questions about any of the steps above, let us know in the comments section.



Loved this tutorial! I was stuck on how to create a save collection on Instagram for ages, thanks to your clear steps I was able to get it done easily