Windows 10 has a voice narrator that can be enabled to assist those who are visually impaired. When you enable Narrator in Windows 10, your computer will read aloud all the keys that you press as well as the text that is on your screen. It will even read notifications and calendar appointments on your Windows PC. This feature can also be useful if you have a problematic computer screen. Narrator can be enabled or disabled in the Settings menu. You can also choose your preferred Narrator voice, change the pitch, and adjust the speed of narration. Read on to discover how to maximize your Windows experience using Narrator.
Enable Narrator in Windows 10
To enable Narrator in Windows 10, follow the steps below:
1.Click on the Start Menu on the lower-left part of your Windows computer screen.
2.Once the Start menu is opened, click on Settings.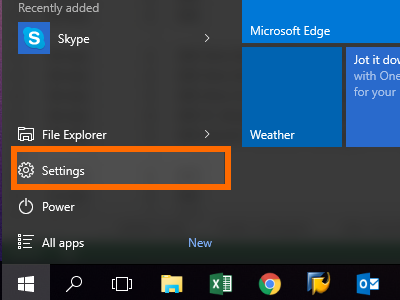
3.In the Settings page, click on the Ease of Access option.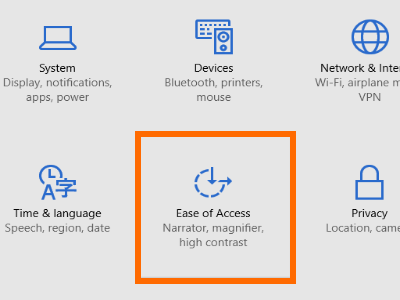
4.From the list of options in the Ease of Access page, click on Narrator.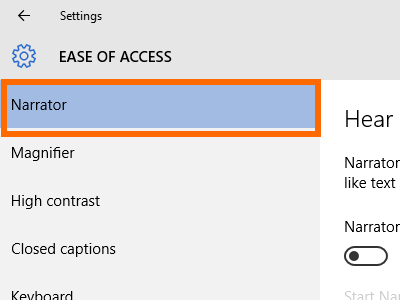
5.Enable Narrator by clicking on the Narrator switch button.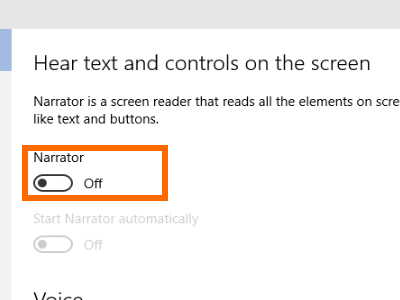
6.Once enabled, you will hear a voice narrating the text on your screen.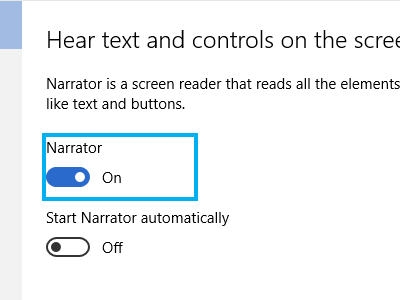
7.You can change the voice, speed, and pitch of the narration by using the appropriate control adjustments on the page.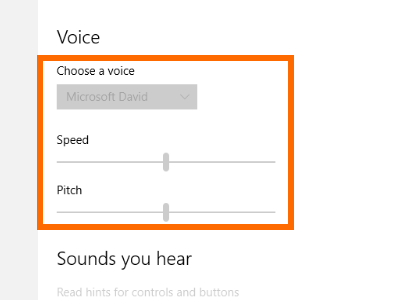
8.You are done enabling Narrator in Windows 10. To disable Narrator, simply click on the Narrator switch.
Note: There is shortcut button for enabling and disabling Narrator. Pressing Windows Key+ Enter enables or disables the Narrator in Windows 10.
I have just outlined the steps to enable narrator in Windows 10. If you encounter any issues with Narrator or find any problems with the steps above, let me know in the comments section so that I can get back to you.

