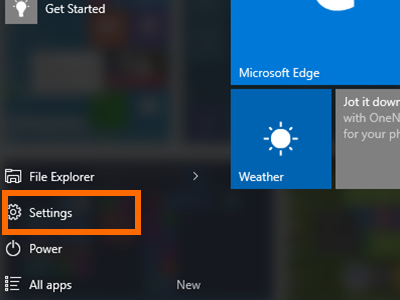
Have you ever gotten frustrated while using your mouse wheel to scroll through long documents or gotten a sore pointer finger from scrolling through an endless Facebook or Tumblr feed? I cannot help with your social media addiction, but I can help you change your mouse settings on your Windows 10 computer to increase your mouse scroll speed to save you time and finger exhaustion. Here’s how:
2.Choose Devices from the settings list.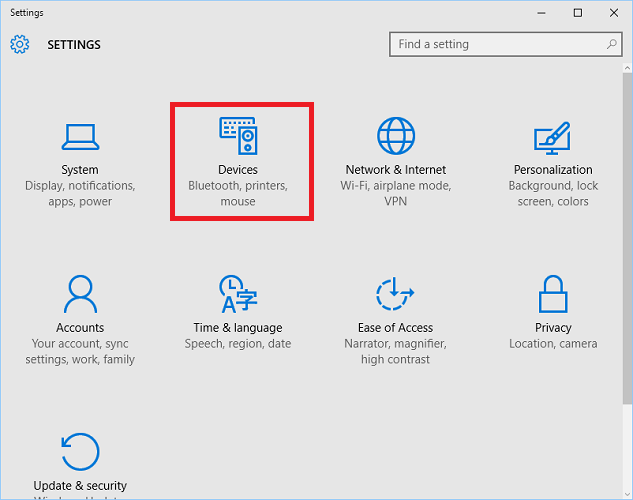
3.Choose Mouse & touchpad from the left panel. There are two mouse settings settings in this panel that control your mouse wheel. The first is the dropdown box under Roll the mouse wheel to scroll. Use this option to choose between scrolling Multiple Lines at a time or One Screen at a time. If you choose the first, you will be able to use the slider underneath to choose the number of lines that are moved up/down with each notch of the wheel. 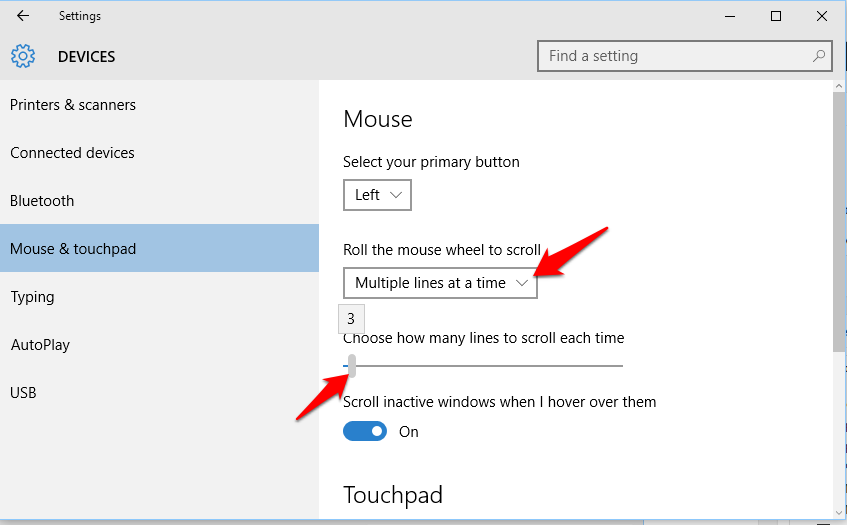
4.A common mouse feature is to have a horizontal scroll (pushing the wheel side to side) in addition to the normal vertical scroll (spinning the wheel up/down). You can set the horizontal scroll to a different speed than your normal scroll. Access this setting by scrolling down to the bottom and clicking Additional mouse settings.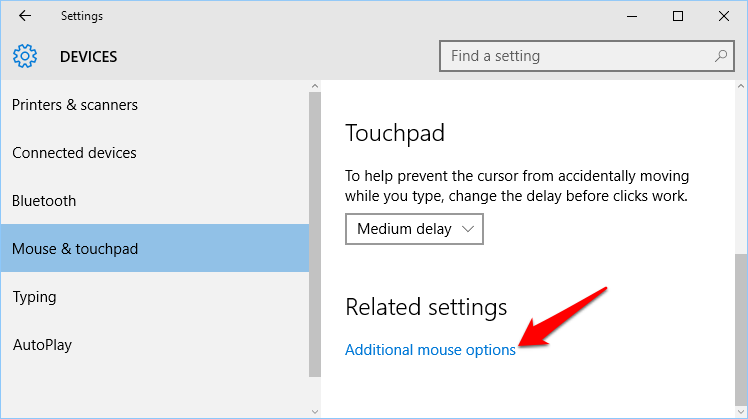
5.Select the Wheel tab from the top of the window that appears. The top box (Vertical Scrolling) was already set in Step 3, but you can tweak it here as well. Set your Horizontal scrolling setting in the second box, the click OK. Common uses for the horizontal scroll is to use it for fine tuned scrolling (one line at a time) or to scroll through a large number of lines at a time. 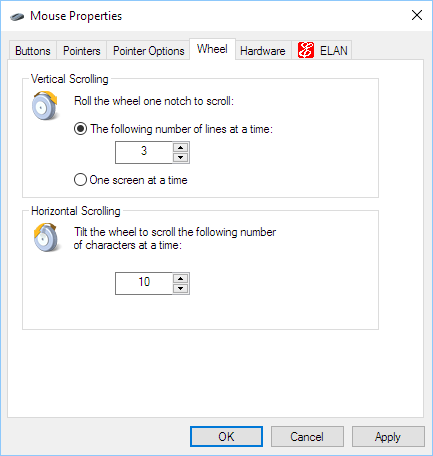
Did you find this tutorial helpful, or do you have other productivity tips? Leave a comment below.

