You can easily make gifs or animations with Google Photos. In fact, Google Photos will occasionally make them for you using a series of similar photos. The photos are stitched together and shown one after another to create what is essentially a moving picture, which is saved as a .gif file. You can then post the gif online, embed it on your website, or use it in chats with your friends or co-workers. Follow the steps in this tutorial to get started.
You will need to use the Google Photos app on your phone or tablet to create an animation, but you can view and download them on photos.google.com once they are created.
1.Take the series of pictures that will be used in your animation. You want to hold your camera as still as possible to limit background motion. Each picture you use will be a frame in your animation. Taking lots of pictures in a short amount of time (like using the burst feature on your phone camera) will create smoother motion in your animation, but it will also make your file size bigger.
2.Launch the Google Photos app. Tap on the “+” on the top of the screen, and then select Animations. 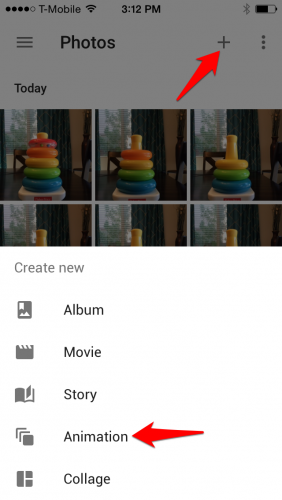
3.Scroll through your photos, and tap them to add them to the animation. To add multiple items at once, tap and hold your finger on the first photo until the check appears on it. Then drag your finger to include as many pictures as you want. You can tap a selected photo to remove it from your selection. Click Create when you are done. 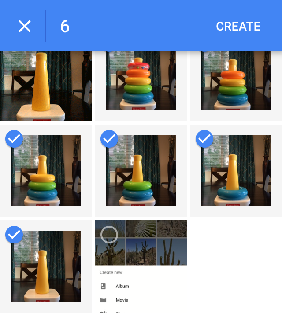
4.Your new animation will now be shown with the rest of your photos. It will be stamped with the animation symbol in the corner so that you can differentiate it from your regular photos. 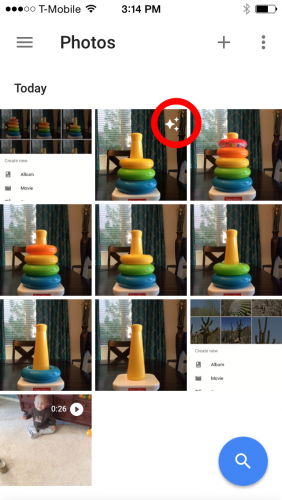
5.You can now share your animation, download it, or include it in a Google Photos album or Story.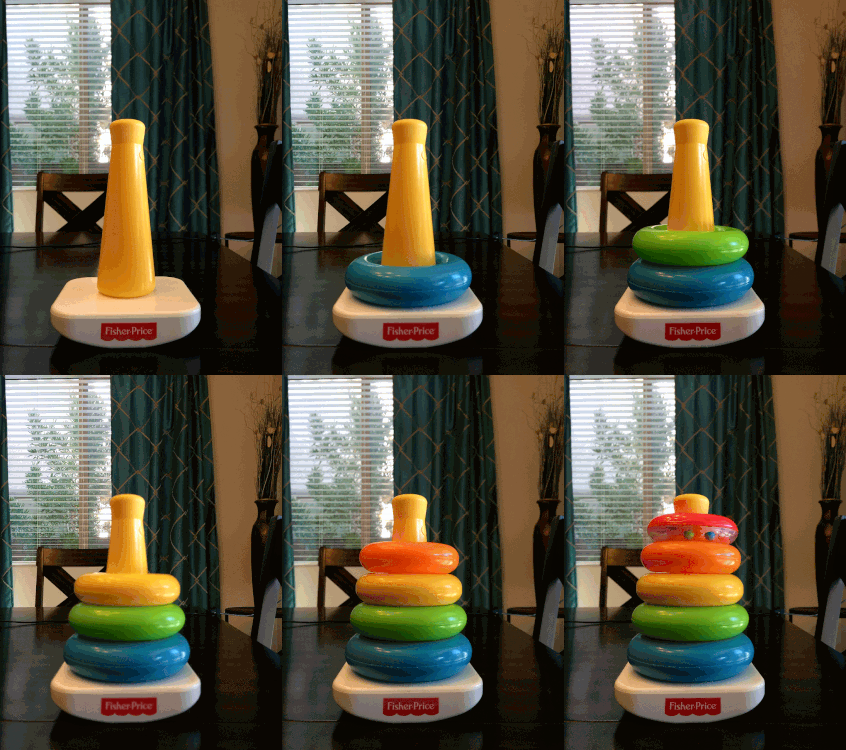
Have you created an animation worth sharing? Let us see it in the comments below.

