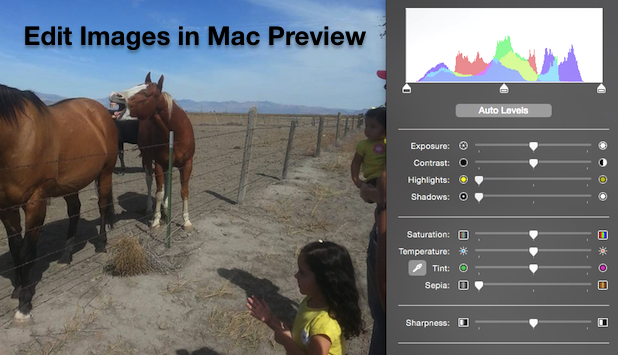
Preview is the default application for opening images on Mac computers. You may be surprised to learn that Preview comes with some hidden photo editing tools. These are not as powerful as what you would find in Photoshop or other paid programs, but they are all that the average photo editor needs to tune up their photos or add black and white/sepia effects.
Use Mac’s Preview App to Adjust the Color of Your Images
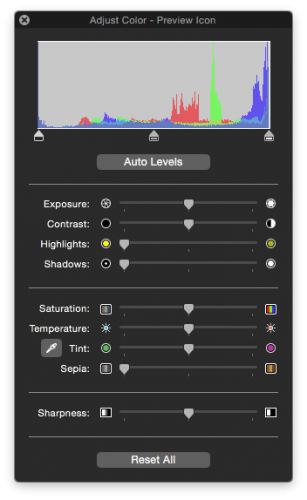
1.Open a photo in Preview, and then open up the Markup Toolbar by clicking the toolbox icon from the main toolbar. Next, click the adjust color icon
 ![]() to open the adjust color panel.
to open the adjust color panel.

2.First, try clicking the Auto Levels button beneath the graph in the adjust color panel. This typically brings some improvement to your image coloring, and sometimes it is all you need.
3.The top four sliders control lighting.
Exposure: Make all the pixels in your photo lighter or darker
Contrast: Increasing the contrast will simultaneously make the whites whiter and the blacks blacker, while decreasing the contrast will move them towards equilibrium.
Highlights: Make the white areas of your photos more or less intense
Shadows: Make the dark areas of your photos more or less intense
4.The next four sliders control color.
Saturation: Increases or decreases the vividness of all the colors in your image. Sliding the saturation all the way to the left will result in a black and white image.
Temperature: Affects the overall tone of the photo by making it appear warmer (more red tones) or cooler (more blue tones)
Tint: This fixes color cast (such as light reflected from grass and plants) by adding or removing green hues. There is an eyedropper tool ![]() next to the tint option that lets you set the white point of your image, which is very helpful for correcting tints.
next to the tint option that lets you set the white point of your image, which is very helpful for correcting tints.
Sepia: Slide to the right to add a sepia effect to your image.
5.The last slider controls image sharpness. This basically controls the transitions within the image. Decreasing this slider will soften your image, while increasing it will make make the transitions more pronounced. Moving too far in either direction will make your image look unrealistic.
6. If you do not like the changes you have made, you can click command-Z to undo your recent edits, or click the reset all button at the bottom of the adjust color panel to revert back to the original image.


