If you already know how to set reminders for Windows 10, you are ready to learn how to manage them. This article will explain the difference between deleting reminders and marking them as complete before they go off. It also explains how to do a work-around to edit your reminders and how to view a history of your completed reminders.
1. Once you set a reminder, you can only mark it as complete or delete it. You cannot edit it. This could be an inconvenience for some users. However, I have heard rumors that the ability to edit a reminder will be added in the future. In the meantime, it is not hard to work around. If you need to make changes to a reminder, simply delete it, and make a new one. It does not take long.
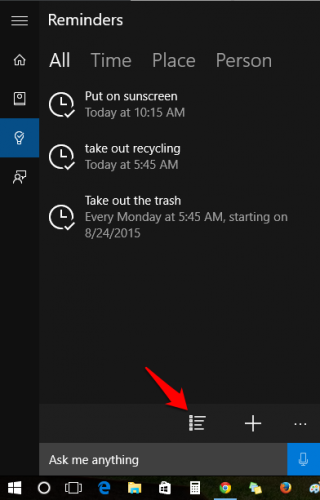
2. The easiest way to delete reminders is to use Select mode. Go to the reminders tab of Cortana, and click the icon indicated below.
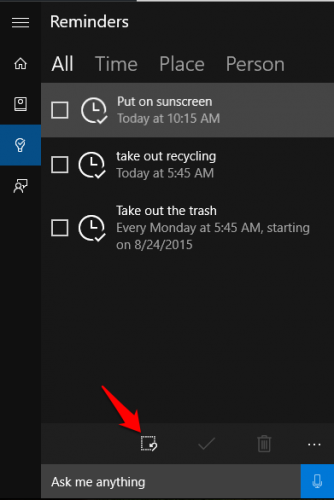
This adds a check box to the left of each item in your reminders list. You can now check as many as you want and delete them by clicking the trash can or mark them as complete by clicking the check mark. The difference is that items marked as complete will show up in your history (as in Step 3) while deleted items will leave no record. Both methods will prevent the reminder from showing up on your screen at the scheduled time.
To exit out of Select mode, click on the icon shown below.
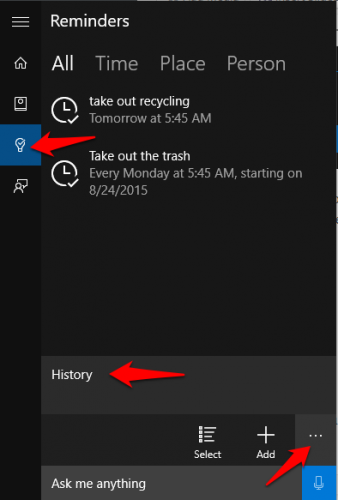
3. Do you want to take a look at your completed reminders? Open up Cortana’s reminders, and click See More, which looks like three horizontal dots. Right now, the only option under See More is your History. Click that to see a list of all your completed reminders. You can turn on Select mode and delete items from your history in the same way that you can delete your current reminders in Step 2.
4.A note about recurring reminders: When you mark a recurring reminder as complete, it will skip only the next instance of that reminder. The only way to stop a recurring reminder is to delete it.


