If you want to animate or edit multiple objects in your presentation and display them at the same time on screen, you should group the objects together to animate all of them easily in one go, instead of repeating the steps for each object.
Grouping multiple PowerPoint objects into one can be very useful and can save you a lot of time as you edit the presentation. Changes you make to a merged object will be applied to all sub-objects, which makes applying effects or animation to multiple elements a breeze.
Here is how to group objects into one:
1. Launch PowerPoint, and open the document you want to edit.
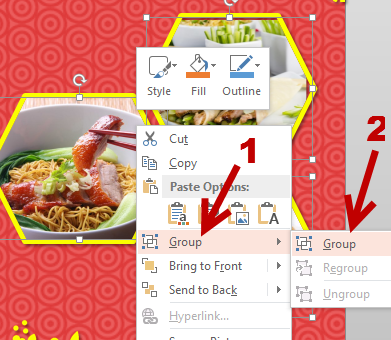
2. Go to the desired slide, and select the objects you want to group while holding the Ctrl key. Click on any of the selected objects to open the context menu, and then choose Group -> Group.

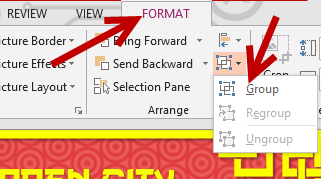
Alternatively, you can go to Picture Tools -> Format -> Group -> Group to merge the objects together.

3. As a result, all the selected objects will be merged into one. After the merging process, there is only one big bounding box around the objects instead of individual bounding boxes for each object. You can move, edit, or delete the newly formed object as you would normally. When a change is applied to it, all sub-objects will be affected.
Before:

After:

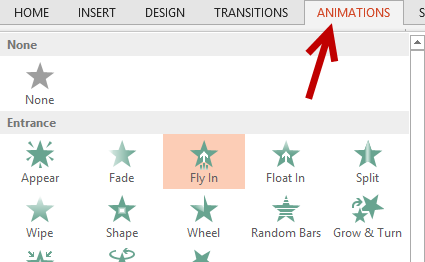
4. Now, you can switch to the Animations tab on the ribbon and apply a new animation to the object. When you play the animation, all objects will appear on the screen at the same time with the same effect.

5. Later, if you want to un-merge the big object, right-click on it, and choose Group -> Ungroup. Sub-objects will be separated, and you can edit them individually. Please note that all the changes you made to the big object will be discarded after you ungroup the objects.


