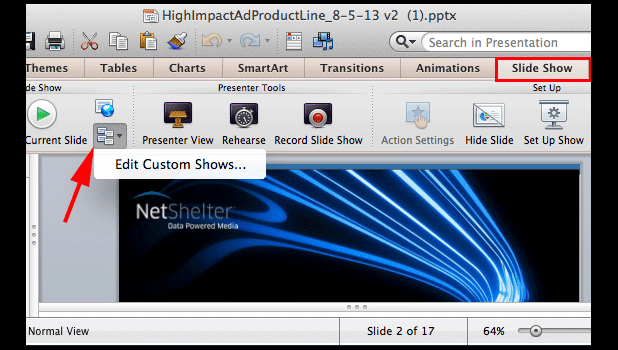
If you typically create several versions of one PowerPoint presentation to target the talk to different audiences, the Custom Show feature can be very helpful.
The Custom Show feature in PowerPoint can help you create variants of the same presentation without duplicating the file. You can use it to place your slides into different groups and later present one of the groups to the appropriate audience. Keeping your lecture information in one file, but selecting only certain slides for your different audiences is a powerful organization technique.
For example, if your original presentation has 10 slides, you may wish to show slides 1, 2, 3, 4, and 5 to team A. Then from within the same presentation you may wish to show show slides 1, 4, 8, 9, and 10 to team B.
Using PowerPoint’s Custom Show to Filter Slides
1. Launch PowerPoint, and open the document for which you want to create custom shows.
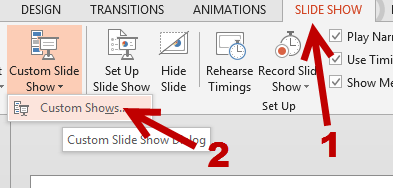
2. Switch to the Slide Show tab, choose the Custom Slide Show option, and then choose Custom Shows.
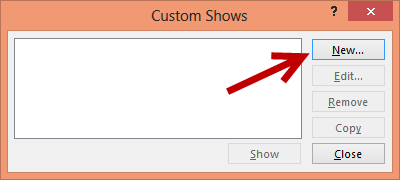
3. In the Custom Shows window, click the New button to create a new show.
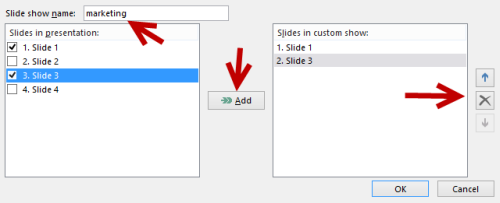
4. Give your new show an appropriate name. Then choose the slides that you want to add to the show using the check boxes on the left side, and add them to the show using the Add button. If your slides are ordered incorrectly, highlight the slide, and click the up or down button to reorder it. Slides added by mistake can be deleted using the X button.
5. When you are done, click the OK button to save. Repeat the above steps to create more custom shows for your audience.
6. Later, when you give a presentation, you can choose your custom show from Slide Show -> Set Up Slide Show.
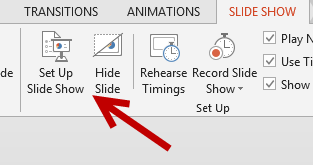
7. In the Set up window, find the Show slides option, switch from All to Custom show, and choose the name of the show in the box.
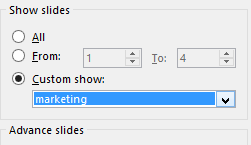
8. Click the OK button to save the changes. Now, you can enter the Slide Show mode as usual. PowerPoint will display the correct show for you.

