Creating unique and creative typography styles is great for a number of projects. By human nature, our eyes are drawn to something that looks fancy or different. Through these directions, you will be introduced to the creation of letters that appear to be clouds.
This intermediate level tech-recipe will show you a basic method of creating cloud typography without using any external sources. The final result may be a little bit messy and difficult to read if you want to display a large amount of text. This will, however, be perfect for a couple of words or titles. This example was performed on a Mac running Photoshop CS6. Similar steps are to be followed on a PC or older versions of Photoshop.
1.First, add a radial gradient as your background. This should consist of two darker colors. You can use something similar to mine. Then enter your text. 
2.Now, you have to make a selection of your text. To do this, hold Command (or Ctrl) and click on the text layer. Then go to the Paths palate, and choose Make Work Path…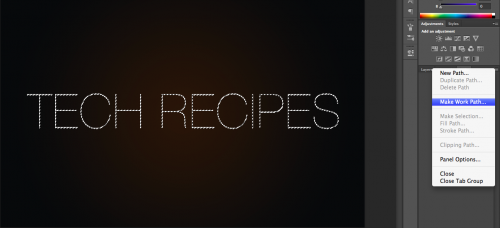
3.Hide the text layer to make it easier to see the Path. Using the Direct Selection tool (A), click on path parts, and delete them until you have a single path representing a letter. 
4.Repeat the step above until you are finished with every letter.
5.Now, we will create our Cloud brush. Select the Brush Tool (B), and open brush preferences (F5). Set your brush settings to values similar or identical to mine. 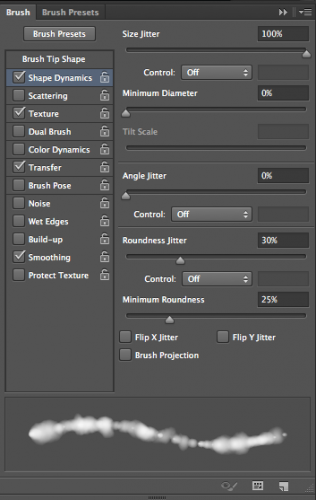
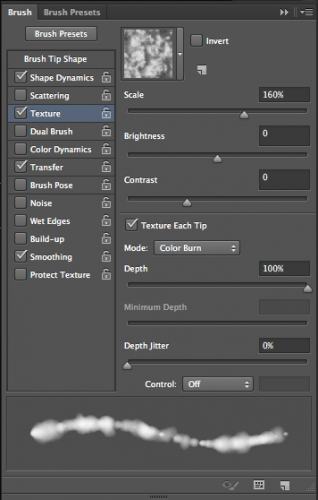
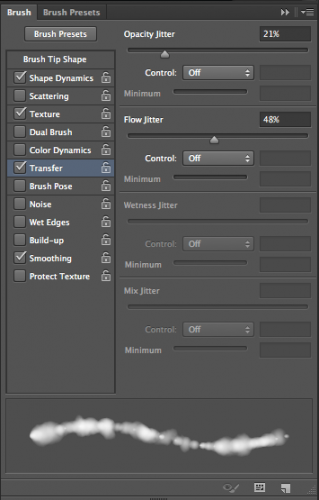
6.With the Direct Selection tool, right-click on the path, and choose Stroke Path…. 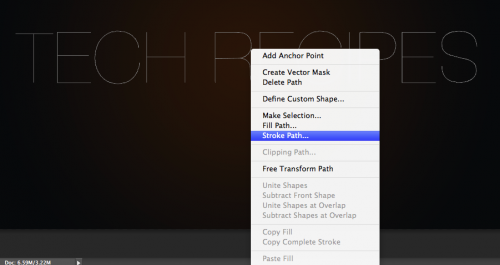
7.You should now have something that looks like this or close to this.
8.Now, we will make the clouds look a bit more realistic. Create a new layer, and switch the foreground color to black. Stroke the path again. Create another layer, switch color back to white, and stroke one final time. You should have three stroked layers in total.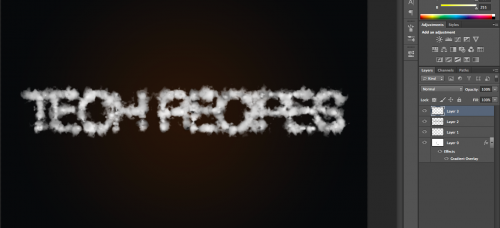
9.You can now go to the Paths palate and delete your path. Then switch to the Brush (B) tool, and draw in some clouds wherever you think the would add to the over all effect. Make sure to use different brush sizes. 
10.We will add a finishing touch. Create a new layer and go to strong>Filter > Render > Clouds. Then set the mode to Color Dodge and using a large soft eraser, brush over the clouds we have painted over in previous steps. 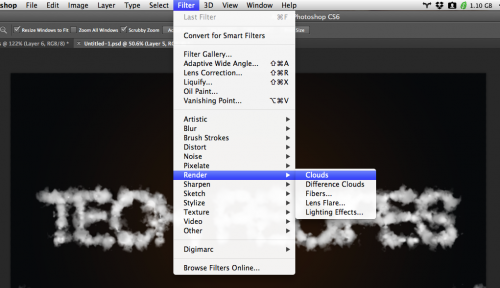
Below you can see the finished product. Results may vary, but overall, you should have something that looks something like this.


