In the new version of Microsoft Office, the default font in Word has been changed. Here is how to change the default font to whatever you wish. This includes Word 2007, 2010, and 2011.
We have had many tutorials about changing Word’s default font over the years. This article combines them all for all known versions. Scroll down to find a particular version of Microsoft Word.
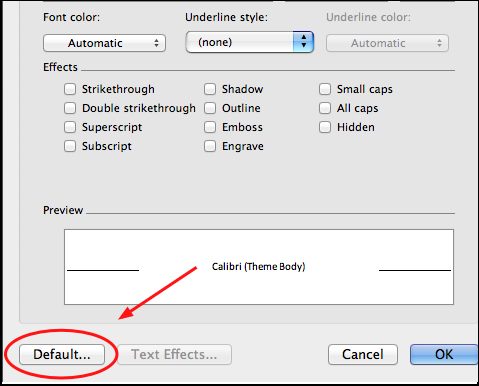
Word for Mac 2011
1. Open a new document, select the Format menu, and click Font.
2. Select your default font in the dialog box.
3. Click Default

4. Confirm with a Yes when asked if you want to change the default font characteristics.
5. Hold down the shift key, click on the File menu, and select Save All.
Word 2007 and 2010
What the is Calibri (Body)? You can change your default font for Microsoft Word if you wish.
1. Open Windows Word.
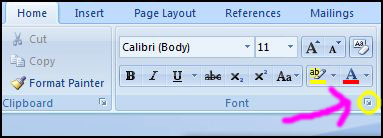
2. Make sure you have the Home tab selected.
3. Open the font dialog box as seen on this picture.

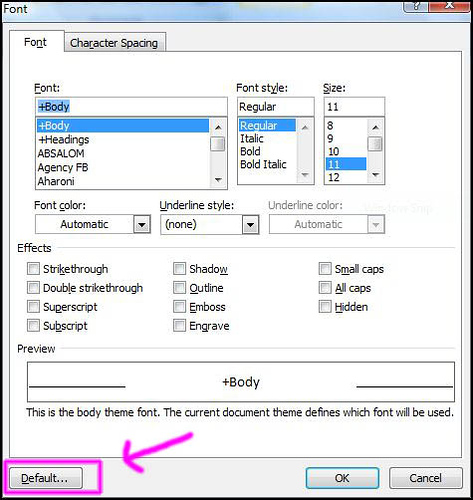
4. Once the font dialog opens, change the default properties you wish. In Word 2007, press the Default button when you are done. In Word 2010, this button text has been changed to Set as Default.

Older Versions of Microsoft Word
1. Open Word.
2. Click the Format menu.
3. Select the font, style, and color you wish you use by default.
4. Click the Default button.
5. Confirm.
6. Click OK.


