Many games and other processor-heavy applications really require the CPU power of multiple cores. However, even if you have a dual, quad, six-core processor, you are not guaranteed that all of them are always turned on. By default, Windows will run all your cores. However, in some circumstances windows will set your active cores lower than the max. Problems arise when the Windows OS then never re-enables all the cores. If you have experienced a drastic slowdown in system performance, this could be your quick fix.
In some circumstances Windows 7 will disable certain cores. Often this is to save in power consumption or to assist older programs in working correctly. Problems arise when the OS disables a core in error or has difficulty enabling the core again.
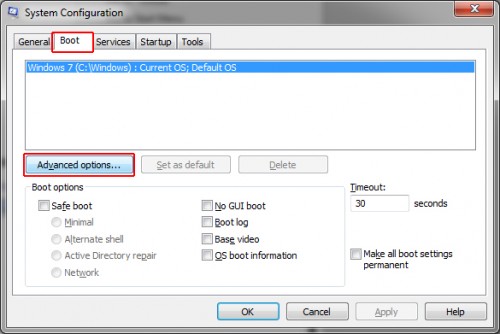
Go to Start and type msconfig.exe. Run the program as Administrator.

Click the Boot tab and choose Advanced Options.

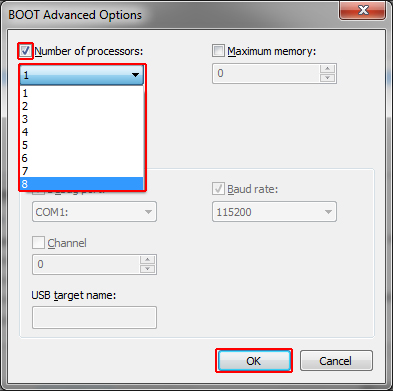
Check the box labeled Number of processors. Pick from the list how many cores you want to run. Click Ok.

Note: If you number of processors is incorrectly displayed or disabled, try ticking detect HAL in the BOOT Advanced Options in msconfig and then rebooting first.
Click Ok again.
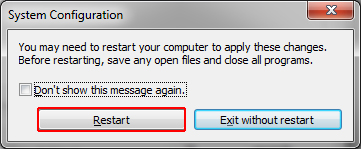
Click Restart.


