XP Mode in Windows 7 is just Virtual PC running a virtualized version of Windows XP. This allow the user to use legacy 16-bit applications. This tech-recipe explains how to enable (or disable) these integration features for Windows XP Mode on Windows 7. Lets take a look.
Windows 7 Ultimate / Professional / Enterprise are the only versions that will allow XP Mode. You can run it fullscreen or in a window and like any virtual machine emulator, it can access your real computer’s hardware such as audio, printers, drives, usb device, etc.
I am assuming you have already downloaded the three necessary files to install XP Mode. (download from microsoft here) and have ran through the initial setup and have XP Mode installed.
Also, installing XP Mode / Virtual PC will install the KB971033 that will detect any Bootloader exploits or activation hacks and break your Windows 7. Just a warning. 🙂
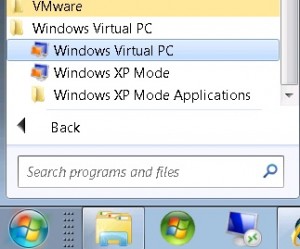
1. Go to your Start Menu > All Programs > Windows Virtual PC > Windows Virtual PC
NOTE: Your XP Mode / Virtual machine must be shutdown befre you can change settings.
2. Right-click on the Windows XP Mode virtual machine and choose Settings.
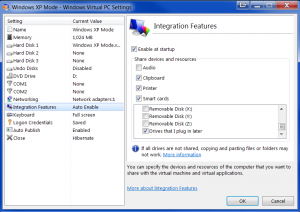
3. Go to the Integration Features
Here you can allow access to your Windows 7’s local drives and network mapped drives, printers, audio, clipboard, usb devices and smartcards when your in XP Mode.
Notes:
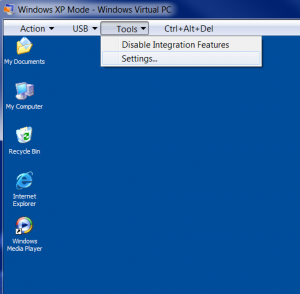
– You can disable Integration Features when not in Fullscreen mode by using the toolbar. You can also enable/disable USB Drives or devices within XP Mode by using the Top Bar’s USB menu.


