Microsoft Teams is an amazing platform for organizing and contacting a team. Teamwork is not easy for a distributed team. Skype and Teamviewer are no more enough given the pervasion of cloud computing. Cloud provides the storage and computing resources to the users. Microsoft Teams is a cloud platform, where you can keep your team together.
This Tech-Recipe is a quick tutorial on How to Start a Project on Microsoft Teams. Imagine that you’re working on a project. A huge project with several different modules. For Example, you are creating software, so you will need a software engineer, a user interface expert, tester, etc. In a nutshell, you need a team of people. This team is, however, codependent on each other for their work. One member needs the work of the other member. While some other member needs work of both of those members. We can say that the team needs to share its general resources such as the memory and even the design tools.
In Microsoft Teams, you can start a project, add the team members, add the software resources that they will share and conduct many other useful activities such as conference calls, messages to the group, individual messages, etc.
How to Start a Project on Microsoft Teams
Step-By-Step Tutorial:
1. Go to Microsoft Teams.
2. Click on “Join or create a team”.
3. There are several different options such as if you want to join a team, public cloud computing, etc. Click on “Create team”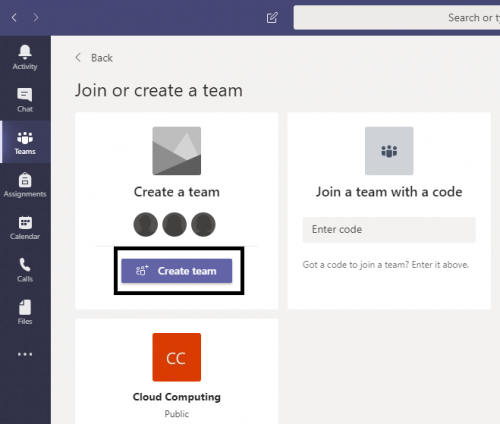
4. Add team name, describe the group, change the privacy and hit “Next”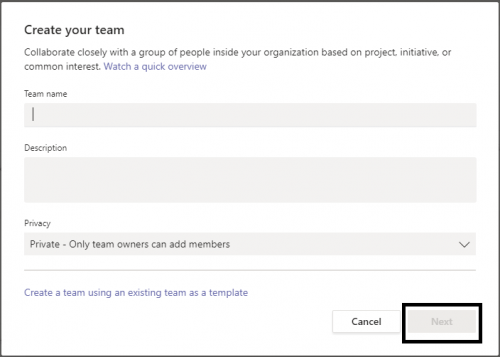
5. Now add the names of your team members or the email addresses that they have associated with the Microsoft Teams product.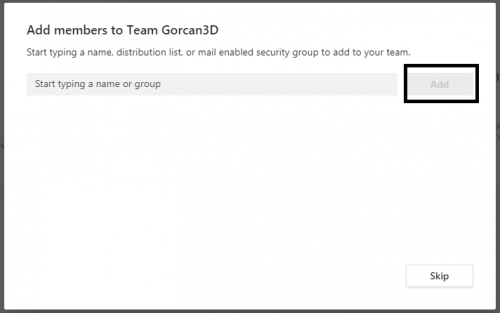
6. You can also change the status of a member.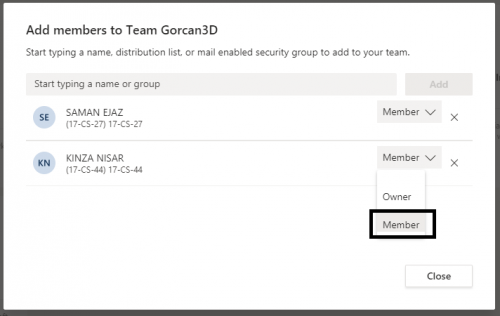
7. And that’s it, you have a project, you can now contact your team, add several different apps, etc.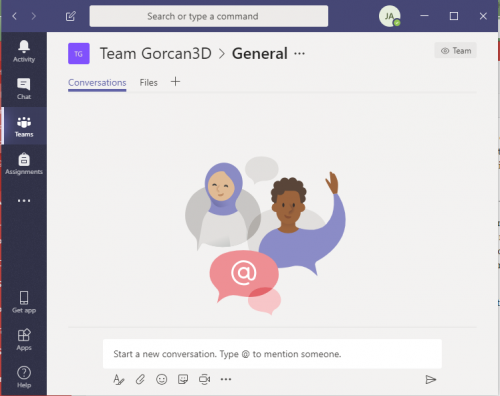
Check out other Tech-Recipes:
How to Use Microsoft Teams ( Part I )
How to Know if Someone is Online on Facebook
See Your Recent Activity on Facebook – Accessing the Activity Log
See Your Recent Activity on Facebook – Accessing the Activity Log
Top 5 Free WordPress Hosting for 2018

