In Skype disconnecting a Facebook account from the application is easy. However, all of the Facebook contacts still remain in your contact list. This can be really annoying because all the Facebook contacts in the list are useless after disconnecting the service. This tutorial will walk you through all the necessary steps to completely remove Facebook’s influence of your Skype account.
Connecting to Facebook in Skype is really easy, but removing all traces of Facebook can be a real pain because there is no option available in the app to erase the Facebook contacts list. Make sure to follow all the steps in this tutorial to avoid app crashes or strange behaviors.
First part: Disconnect Facebook from Skype.
1. Launch Skype.
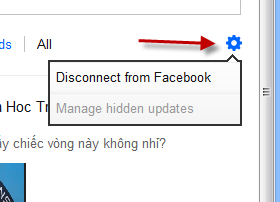
2. In the main window, click the small gear icon and choose Disconnect from Facebook.
3. Double-check if Skype is disconnected from Facebook or not by clicking the gear icon again. If the option is Connect to Facebook, then the process is completed.
Second part: Remove Skype app from Facebook.
1. Log in to your Facebook account.
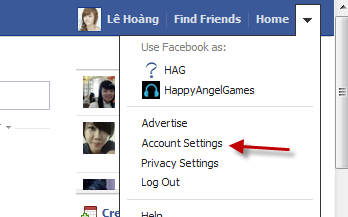
2. Click the small arrow button at the top and choose Account Settings.
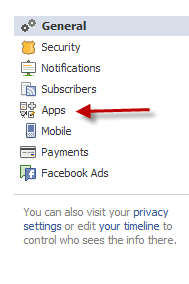
3. In the Settings screen, click the Apps section on the left side of the page.
4. Find the Skype app on the right side and click the x button at the end of the line.
5. When the confirmation box pops up, click Remove. You also have an option to remove all the app activity from your Facebook account if you wish. This is optional.
Third part: Remove Facebook contacts from Skype.
1. Exit Skype if it is running.
2. Open Windows Explorer. Make sure you have enabled the viewing hidden files and folder feature.
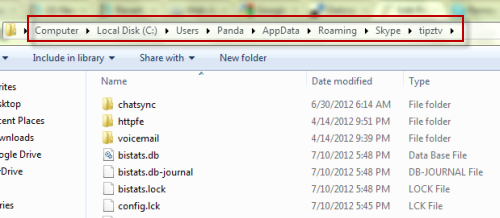
3. Navigate to C:\Users\Tech-recipes\AppData\Roaming\Skype\tipztv. Replace Tech-recipes with your actual Windows user name, tipztv with your actual Skype user name.
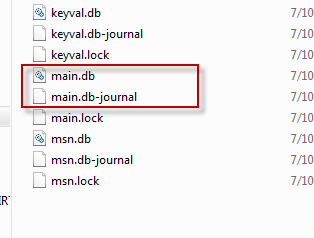
4. Delete the main.db and main.db-journal files.
5. Re-launch Skype and log in to your account. If your contact list is blank, log out and re-log in again.

