Browser extensions, sometimes known as “add-ons,” integrate with your web browser to give you additional features and integrate with services you use. Extensions can block advertisements, let you record your screen, add pages straight to your Evernote or Pintrest account, block time-wasting websites, tell you when an item you are shopping for is cheaper on on another major retail site, and more.
Extensions can really enhance your internet experience, but keep in mind that too many of them can bog things down and make your browser run slower. You should keep your list of installed extensions relatively short.
Install Extensions in Google Chrome
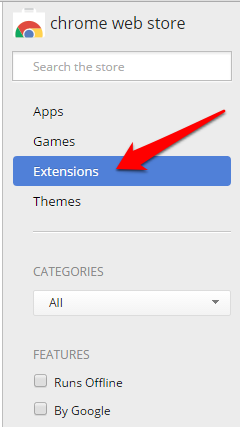
1.Visit the Chrome Web Store and click Extension in the left panel.
2.There are a number of filtering options such as category, features, and ratings in the left panel. You can use these to narrow down the huge selection of extensions to a few relevant ones. The main area to the right shows you a list of extensions in tile view. Each tile will display the name, price, average rating, and number of ratings for the extension. Usually, I do not bother with extensions that received lower than 4 stars and that have a rating less than 100. These are likely to be buggy.
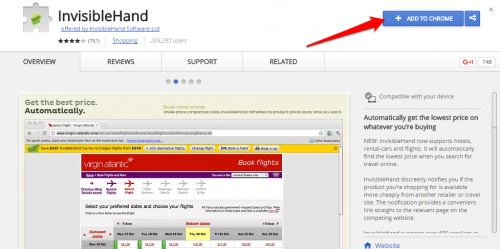
3.Click on a tile to view more details about it. Click through the tabs to read an overview, reviews, support, and related apps. I recommend always checking out the related add-ons, because you might find a competitor who does the same thing better. When you decide you want to install the extension, click the + Add to Chrome button in the upper right corner.
4.You will be told what access and permissions the extension will use. If you are comfortable with what is being requested, click Add extension.
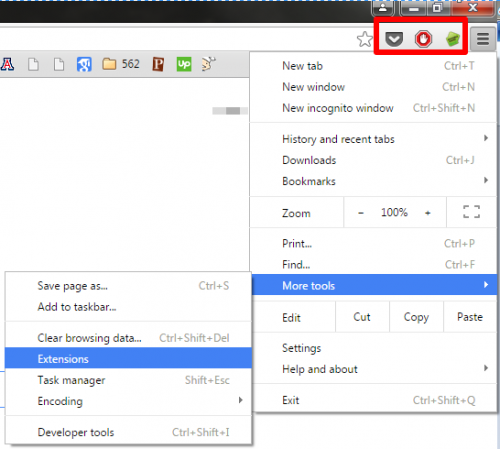
5.Most extensions will display an icon in the upper right corner of the chrome window. Click the icons to access quick settings and functionality. To disable, delete, and view the complete list of your extensions, go to Menu>More Tools>Extensions. 

