I have three email accounts set up on my iPhone: my personal email, my junk email, and my work email. I have to check all of them occasionally, but I only want push notifications when an important email message comes to my personal email account. The rest can wait until I sit down to check them. One of Gmail’s best features is that its tabs can be used to pull out promotions, social media notifications, and updates from your primary inbox automatically. (See how to use tabs effectively here.) I set up my iPhone to push notifications only when new email messages come to the primary tab of my personal email. Here’s how set up your Gmail account to limit notifications on your iPhone.
Note: Steps 4 and 5 below contain bonus information which describes how to customize the alerts for your notifications in Gmail.
1.Launch the Gmail app on your iPhone, and open up the menu. Access the menu by tapping on the three horizontal lines in the upper left corner. Next, open up your accounts by tapping on your email address across the top of the menu. Select one of your accounts, and tap settings, which is the gear in the upper right corner. 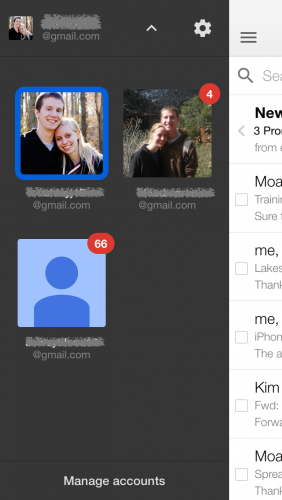
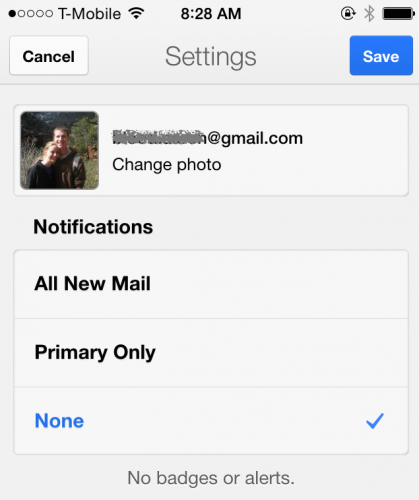
2.Within the settings for each of your accounts, you will have three options for notifications:
All New Mail: This is self explanatory. You will get notifications for all new mail coming to that account, which will likely include some junk mail.
Primary Only: This takes advantage of Gmail’s tabs. You will not be notified when incoming email messages are sorted into your promotions, social, or other tabs.
None: You will receive no notifications for email messages from this account.
I set up my Gmail so that my personal email account is Primary Only. My work and junk email accounts are set to None.
3.If you simply want to turn off all notifications from Gmail, go to to your home screen and then Settings>Notifications>Gmail. Toggle off Allow Notifications.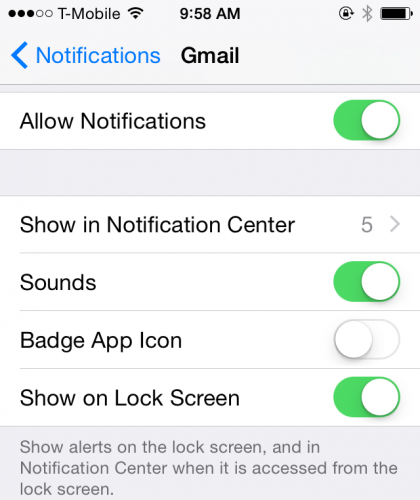
4.Do you want to change the way your notifications come? Go to Settings>Notifications>Gmail. There are several options for customizing your alerts. When Allow Notifications is toggled on, you will be able to set how many emails show up in your notification center at a time and turn alert sounds off/on. You can also turn the badge app icon off/on. When the badge icon is on, a red circle with the number of unread emails will appear on the Gmail app on your home screen. You can also determine if you want your Gmail notifications to appear on the lock screen, which is good if you want to be able to quickly check for notifications, but it is bad if you are worried about people getting a peek into your email account without having to unlock your phone. It is up to you.
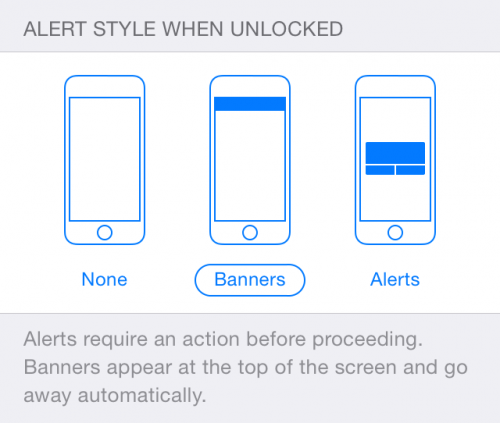
5.You also have the option to set the alert style for when your phone is in use. Alerts are the most intrusive. They pop up in the middle of your screen, and you have to click a button to get them to go away. This guarantees that you will see the notification, but it can be annoying. Banners are less intrusive. They pop up on the top of your screen and go away without you doing anything after a few seconds. 