Web users hate filling out forms online, especially on a PC. They can be frustrating and slow to complete and usually contain several steps and validation problems. These lead to high user frustration and drop-off. In order to make things easier for users, browsers have for long been able to autocomplete certain fields on behalf of users. Google Chrome, however, took this a step further in mid-2012 by introducing the Autofill option, which can fill in forms based on users’ Autofill profile.
Google Chrome now has an option that helps users fill out forms easier and faster for credit cards and addresses details in Google. By using the autocomplete feature, Google Chrome can ensure users’ happiness by giving them the opportunity of auto-filling their checkout forms with 100 percent accuracy.
Adding an address on Google Chrome can help in preventing the browser from incorrectly guessing different form files which could result in poor user experience.
You can also save time filling out forms online using Google Chrome Autofill, which fills in online forms on your behalf. After you must have finished filling out a form, you will see a prompt to save the information provided. In case you want Google Chrome to add the information to Autofill, simply click on save.
With Google Autofill, you can add and edit addresses, phone numbers, and any other relevant information.
Whenever you save an address, Google Chrome Autofill will also include any of the following information alongside the address:
- Name
- Organization
- Street address, including state, city, or province, ZIP or Postal code, and country
- Phone number
- Email address
For today’s post, I will show you how you can include an address on the Google Chrome browser on your PC. It is, however, important to know that before you can successfully go through the process of adding an address on Chrome, you have to make provision for other required fields on the Autofill page.
How To Add An Address In Google Chrome
1. Open Google Chrome.
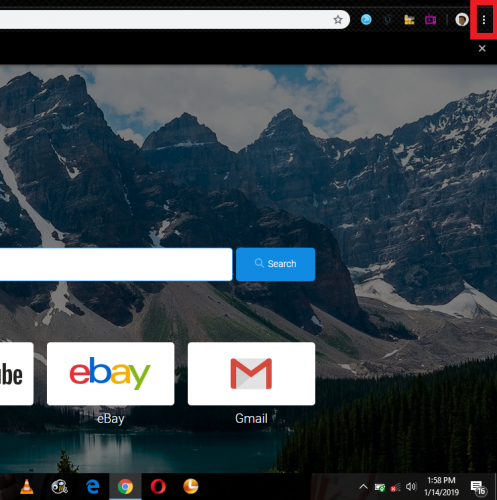
2. Click on options.
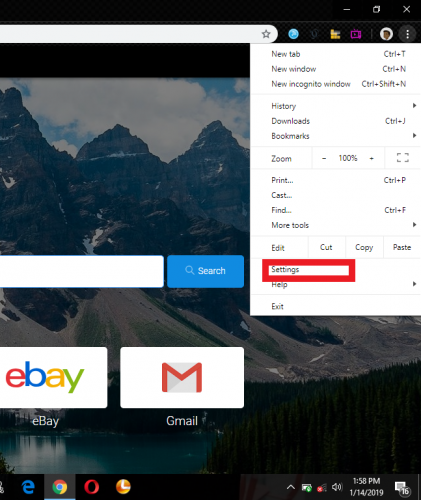
3. Click on settings.
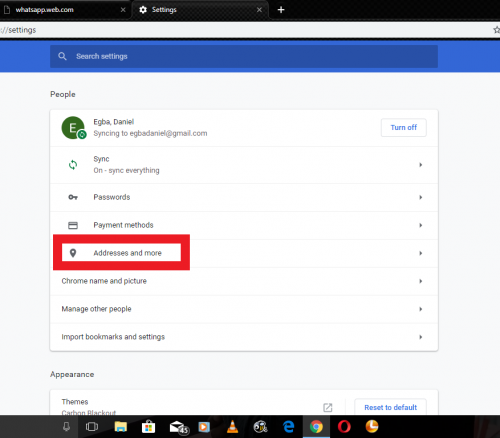
4. Click on addresses and more
5. Under address, click on add.
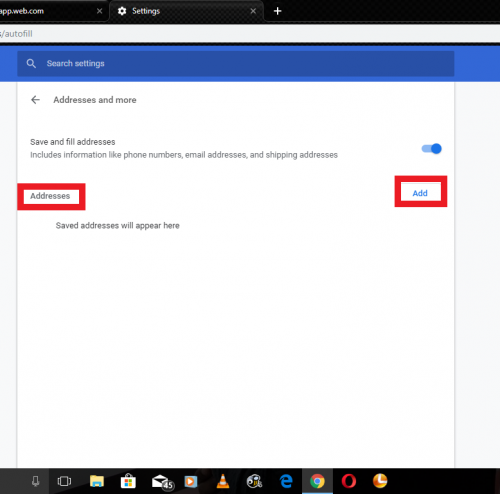
6. Type in your address, alongside other required information and click on save.
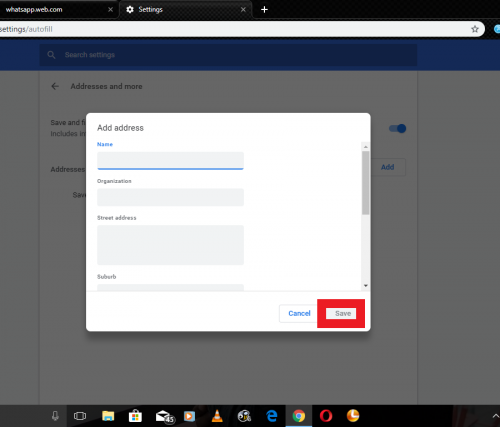
And there you have it, that’s How To Add An Address In Google Chrome in 6 easy steps.
Conclusion
Autofill data is often in the cloud, and not on your PC. You always need to take note of the data (address and otherwise) you are saving on Google Chrome as well as where you are saving it when it concerns your personal information.
You can delete Autofill information at will via Google Chrome on your PC like the one you find on a Chrome book. Since the data are stored on Google private cloud, the information will be same across all instances of Google Chrome you are signed into. That is another good reason you need to make sure you sign out when you are done using a PC you might be sharing with different people.
But in a situation when you have a PC all to yourself, filling in your address will help ease the stress of repeatedly filling in personal information each time you want to make a purchase online using Chrome browser on your PC. Try the steps mentioned above and let me know if they worked for you via the comment box.
Here are some related articles you may find useful;
How To Report An Issue On Google Chrome
How To Add A Payment Method To Google Chrome Android
How To Mute Websites In Google Chrome

