In Google Calendar, users can create multiple calendars for different purposes. Over time, the purpose of a calendar may be changed, so it is a good idea to update the calendar’s settings such as name, description, or time zone to reflect the changes.
1. Log in to your Google Calendar account.
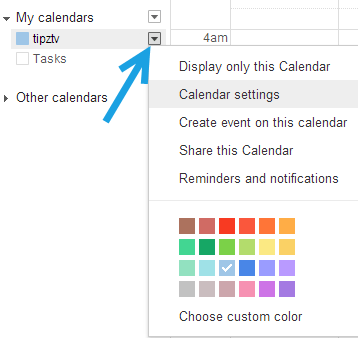
2. Once you are logged in, find your account on the left-side bar. Then click on the arrow icon, and choose Calendar settings. In this pop-up window, you can also change the color of the calendar. You can choose from several preset colors, or you can choose your own by clicking on Choose custom color.
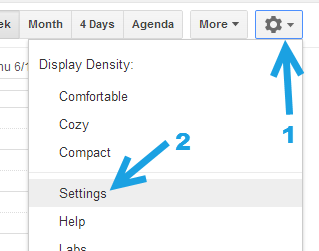
Alternatively, you can click on the gear icon at the top right of the page and choose Settings.
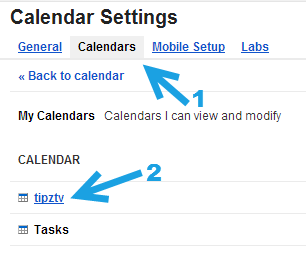
In the Calendar Settings page, make sure to switch to the Calendars tab and choose the calendar you want to edit. Editable calendars are the ones that you have created. The Tasks calendar cannot be edited.
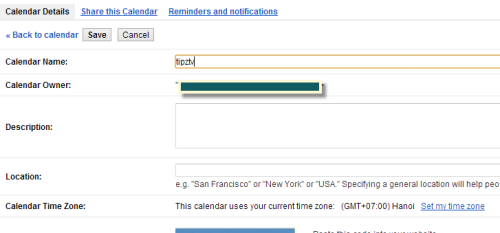
3. When you are redirected to a specific calendar’s settings page, you will see all the basic details of the calendar on-screen. Details you can add or edit include the following: Calendar Name, Description, Location, and the Calendar Time Zone. Please note that you can have different time zones for each calendar. The bottom of the page is where you can find options to embed your calendar and share a private or public address in XML, ICAL or HTML.
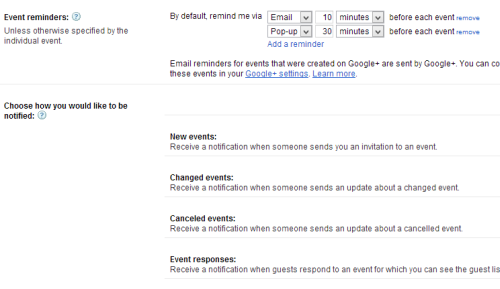
4. To access more advanced settings such as event reminders interval or notification, switch to the Reminders and notifications tab.
The Event reminders section lets you change the default reminder time for your event. This interval will be used for all the events that you have not given a custom reminder time.
The Notification section lets you decide for which type of events you wish to receive notifications. You can choose to receive a notification via Email or SMS. (You must add your phone number to use this feature.)
