This guide is an alternative, offline method of backing up your Gmail emails. I will explain how to setup your Gmail account to use POP and in turn use Microsoft Outlook Mail or Apple Mail to download your entire gmail account to save offline. You can archive the messages in Apple Mail or save as a PST file in Outlook. Keep reading for the details.
1. Go to your Gmail Inbox and sign-in.
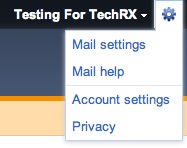
2. Click on the Gears link in the upper right area, next to your email address and choose Mail Settings
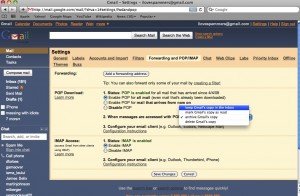
3. In the Settings page, click on the Forwarding and POP/IMAP tab.
Under the POP Download area, be sure to check the “Enable POP for all mail (even mail thats already been downloaded“. This will allow you to redownload EVERY email from your Gmail account via POP.
Also be sure to set the action of what receiving POP mail will do to the original emails. If you want it to leave them as they are, just choose the “Keep in Gmail’s inbox”, etc. If you are only doing this once, you can have Gmail archive the emails (doesn’t delete but just moves to Archived folder in Gmail).
-Click Save Changes when done.
Configure your email client for your GMail POP Account:
4. This section of the guide deals with setting up your GMail POP email account in either Microsoft Outlook or Apple Mail. Once we do this, we can then download all of our GMail email to our local email client and then be able to save the messages offline. This step is broken up into A or B depending on your email client.
A. Setting up your GMail POP account in Apple Mail
-Open Mail on your Mac. Cancel the email setup wizard and go to Mail > Preferences and then go to the Accounts tab.
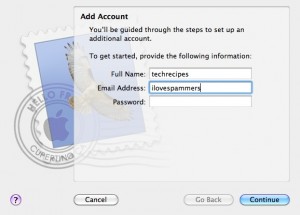
-Click the + button to add a new account. You will be prompted to put in your name, email account and password. Only enter in your Name and the first part of your GMail email address (ie ilovespammers and not [email protected]) and leave the password blank, click Next.
This forces the wizard to let us manually choose the account type!
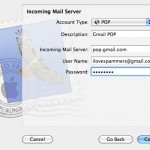
-Be sure that the account type is POP (via the dropdown) and then use the following settings to configure the POP account on the next 2 pages:
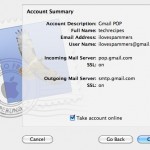
- Description: Gmail POP
- Incoming Server: pop.gmail.com
- Username: gmail address
- Password: gmail password
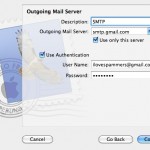
- Outgoing Mail server: smtp.gmail.com
- Check Use Authentication and use same gmail address for username and password
-Once you are configured, check the “Take account online” and click Create.
-Mail should now be all setup and configured with your GMail POP account.
You will notice that you only get a batch of 300 or so emails on the first send/receive. However, you can just leave your mail client open over night and let it slowly download all the messages. Or to fully download ALL emails instantly, you will need to manually hit the Get Mail button after each batch of 300 or so emails downloads. This will force the mail client to keep getting batches of emails.
-Once all messages are downloaded, you can then either Archive the individual messages to a folder or leave them in your Mail message inbox or a folder for offline keeping. These messages and attachments are downloaded to your local hard drive!
—————
B. Setting up your GMail POP account in Microsoft Outlook 2010 (windows)
–Open up Outlook.
If this is the first time you have ran Outlook, we can use the Wizard to setup the account. If not, go to File > Info > Account Settings and click on the E-Mail tab and hit New.
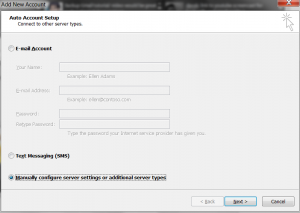
-On Wizard, choose “Manually configure server settings or additional server types” and click Next.
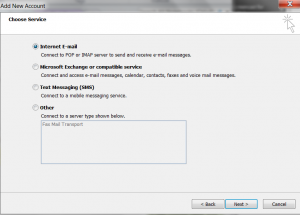
-Then Choose Internet E-mail and click Next.
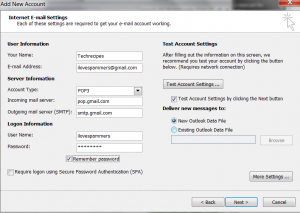
-Now we need to configure our account settings with this info:
- E-Mail: your gmail address
- Account Type: POP3
- Incoming mail server: pop.gmail.com
- Outgoing mail server: smtp.gmail.com
- User Name: gmail email address
- Password: gmail password
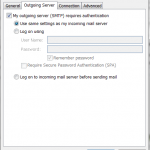
-On the same screen, click on the More Settings tab. We will need to configure two tabs here. Go to the Outgoing Server tab and be sure to check the “My outgoing server (SMTP) requires authentication” and Use the same settings as my incoming mail server.
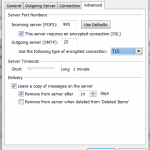
Then click on the Advanced Settings tab. Click the “This server requires an encrypted connection (SSL)” and the incoming server port is: 995. Finally, change the outgoing encrpytion type to: TLS
Click OK and then Next back on the settings page. Outlook will do a test message send and then create the account. By default, Outlook 2010 will save the account PST file to C:\Users\username\Documents\Outlook Files. This is where your PST file of your Gmail emails will be too!
Again, like with Apple’s Mail client, the messages will slowly come down in batches. Once they are all downloaded, you can then move the message into a new PST file and then save that offline to safe keeping.
NOTES:
-You will need to re-check the option in Gmail for POP mail if you want to redownload all of your messages on a different computer/email client. Once you click it and all messages are downloaded, any further clients you setup with the same pop settings will only get new messages.
-If you want to explicitly archive the messages in Gmail after they are downloaded in your Mail or Outlook client, be sure to check the: When messages are accessed with POP: archive Gmail’s copy (this moves the message to your Gmail’s Archive folder and out of your inbox). You can in turn have it delete the emails from Gmail too. Again this is in the Settings > Forwarding and POP/IMAP area in Gmail.
-By default, Outlook 2010 will save the account PST file toC:\Users\username\Documents\Outlook Files. This is where your PST file of your Gmail emails will be too!

