Since the amount of space for tabs on a Facebook page is limited, only a few tabs are visible to users, while the remainder are listed under the More section. By default, tabs are positioned in the same way on all pages, so you may need to rearrange the position of the tabs to suit your needs. Making important tabs visible to users can make a huge difference in the way your fans interact with your Facebook page.
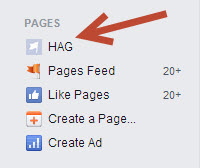
1. To edit a Facebook page, log in to the Facebook account you use to moderate the page, and then access the page you need from the left sidebar. Please note that not all pages are listed there, so you may have to click More to reveal all the available pages.

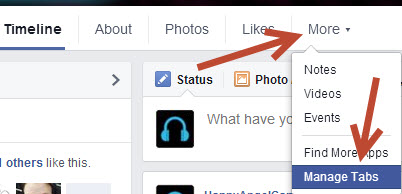
2. When the Facebook page has loaded, locate and click the More tab below the page’s cover to reveal more options, and choose Manage Tabs.

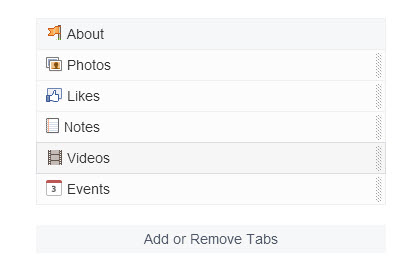
3. Once you have clicked the Manage Tabs option, an Edit Tabs window will pop up on-screen. All of the tabs that are available will be listed according to their positions, from left to right. To move a tab to a new position, drag the corresponding tab’s handler up or down. The topmost tab will appear in the leftmost position in the navigation bar. Please note that the About tab always appears next to the Timeline tab, and you cannot change its position.
When you are done, click Save to preserve the changes.

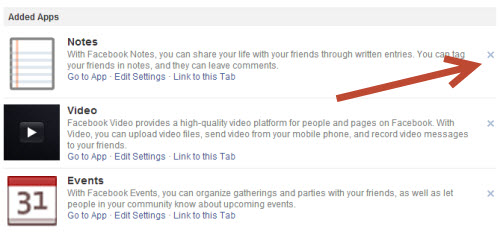
4. You can also add or remove custom tabs from the bar, if you want, by clicking the Add or Remove Tabs option. In the Apps section, Facebook will suggest apps that you may want to add to the page. Clicking the Add App button will add the chosen app to the end of the tab list, while clicking the X button will remove the app from the bar.


5. Depending on the type of Facebook page, different tab combinations can be created. You should place the tabs wisely so that the most popular sections are easily visible and accessible to your fans.


