By default, every Facebook group has an address, but the long number at the end makes it difficult to remember. Luckily, it is possible to set your own group’s address so that everyone can access it easily.
Below is an example of how the default Facebook group’s address looks. It is almost impossible to remember the link, and one may not be to access the group without an exact link.
![]()
Compared to the example above, the custom link below is more readable and easier to remember.
![]()
Here is how to set your group’s custom address
Please note that you must be the group’s admin to set the link.
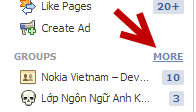
1. Log in to your Facebook account, and choose the group for which you want to set a custom URL on the left side of the page. By default, many groups are hidden to keep the list organized. You may need to hover your mouse over the group area and click the more button to see all the groups.

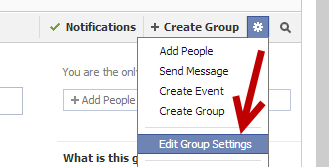
2. Once you are in the group, click the gear icon at the top right of the window, and choose Edit Group Settings from the menu.

3. In the Group Settings page, find the Group Address option, and click on the Set Up Group Address button. Although we are going to set up an email address for your group, the name of the email will be used in the web address for the group.

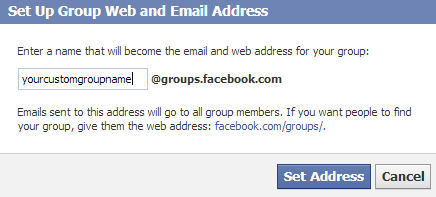
4. Enter your desired group name in the field. Keep the name short, and related to the group so that other people can remember the address easily. When you are done, click the Set Address button. Please note that you can only set the address once, so be careful with the name choice. You cannot change the name after it is set.

5. Your Facebook group email will be in the following format: [email protected]. Email messages sent to this address will reach all group members.
Your group web address will be in the following format: facebook.com/groups/your-custom-name. You can send this address to everyone, and they will be able to reach your group from any browser.


