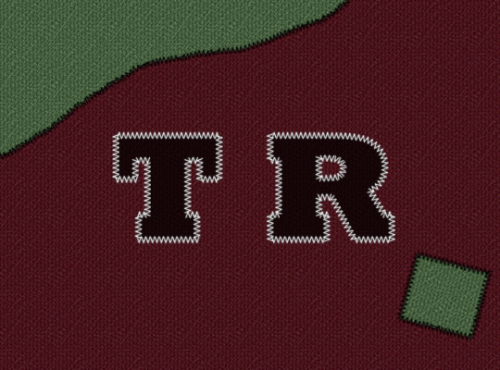
This Photoshop tech-recipes tutorial will cover the easiest way of creating a denim background and then “stitching” your text over it.
To speed this tutorial up, you will have to grab a set of stitch brushes if you do not already have one.
You can download one for free here: http://pshero.com/assets/tutorials/0065/StitchesOfThread.abr.
Now that you have your stitch collection, we can get started. I am using a Mac with Photoshop CS6, but similar steps are to be followed on a Windows PC as well as older versions of Photoshop.
1.First, you should create a new project. You can make it any size you would like. When your project has been created, you have to unlock the background layer by double-clicking it and hitting Enter. Then, through the fx menu, add a Pattern Overlay. Click on the little gears icon, and select Patterns 2. Then choose the blue denim pattern. (You will be able to change the color later.)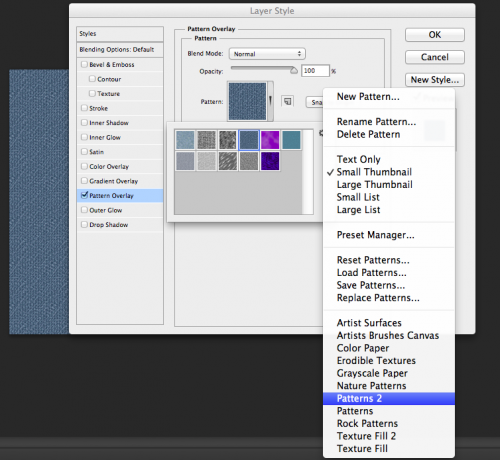
2.Now, using a bulkier font, type in your text. Choose black as your foreground color for best results. 
3.Make a new layer, and call it Stitches. Then, with the layer selected, Command + Click (Ctrl + Click) on the text layer to make a selection. 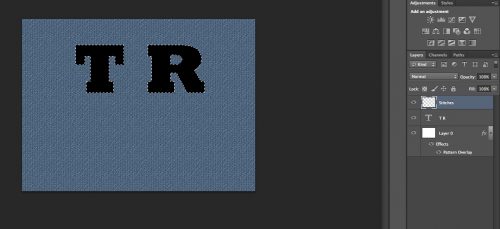
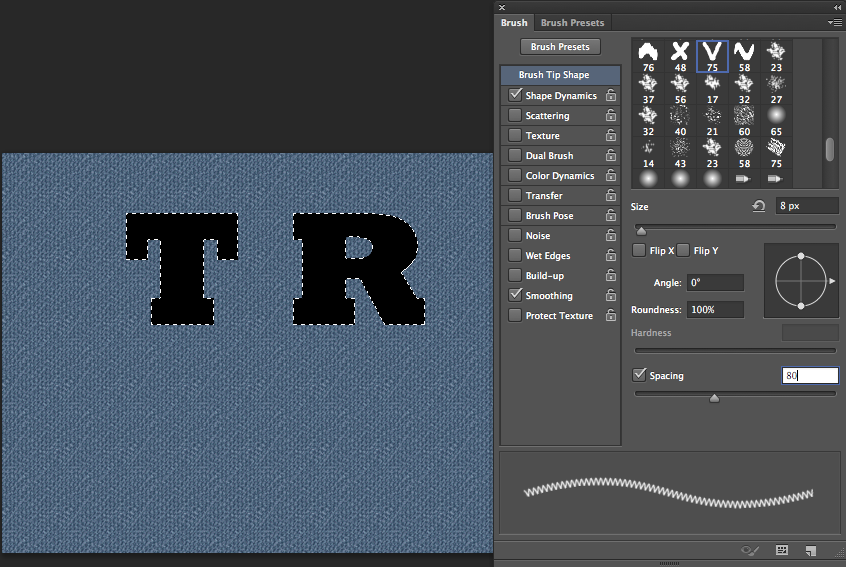
4.Now, select the brush tool, and then hit F5 to bring up the brush options. Load the brushes you downloaded, and select the V brush. Set your values as I have below. 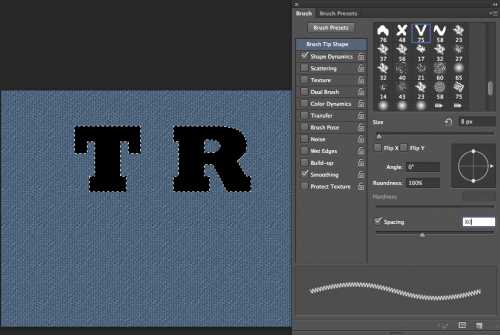
5.Go back to the text layer, and go to Type > Create Work Path. 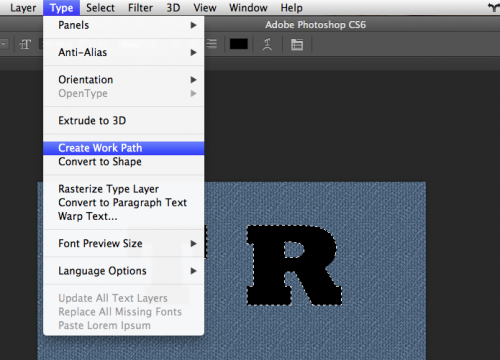
6.Now, using the pen tool, select the work path of your text. You may need to do this for each individual letter. Then right-click and choose Stroke Path…. When prompted, choose Brush, and hit Enter. 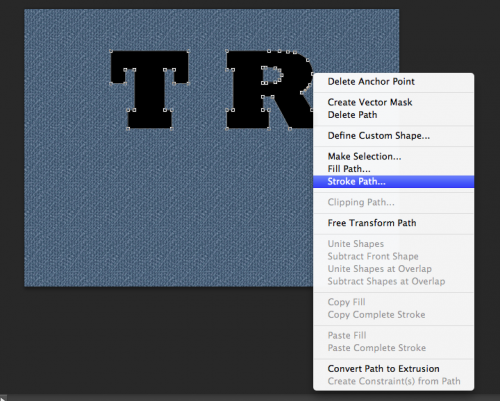
Viola! You should now have something like this. 
7.We can make the stitching a bit more realistic. Using the fx option, add a Drop Shadow to your stitching layer with values I have used below.
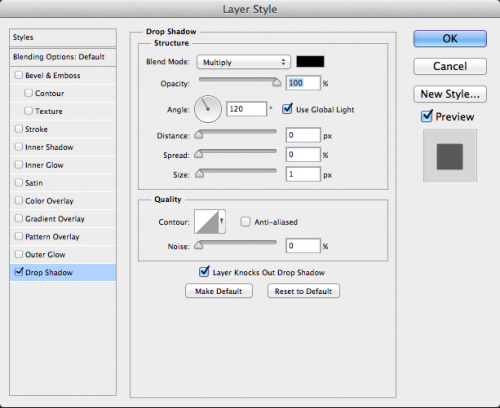
Now, add a Bevel & Emboss layer style with values similar to mine. Then hit OK.
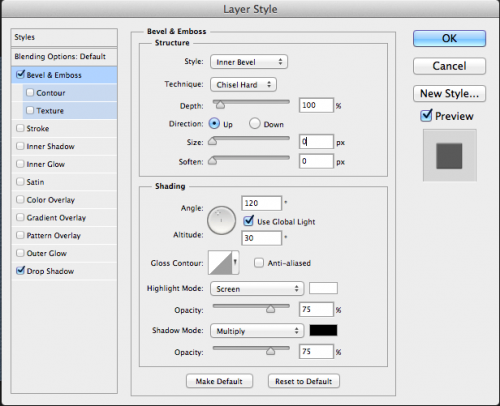
8.Now, we will change the color of our denim. With the denim layer selected, go to Layer > New Adjustment Layer > Hue/Saturation.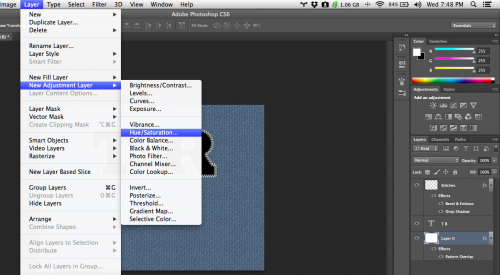
9.I have decided to go with a nice red color for my main background. Feel free to play around with the sliders until you get that perfect color you need. 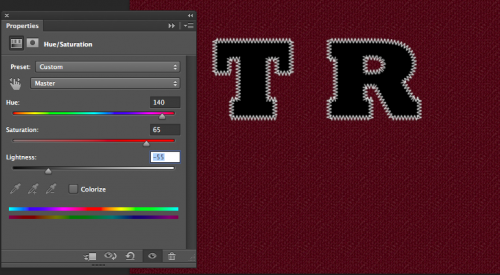
10.Now, we will add the finishing touch. Select the text layer, and change its mode to Multiply and its fill to roughly 70%.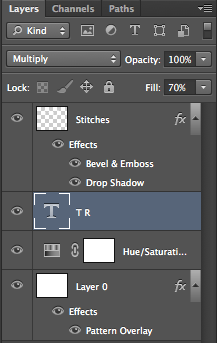 You are now finished. Feel free to play around with more stitching types and more denim to get the result you want. I have spent a little bit of time playing around with my final product, and this is end result. Do not be afraid to experiment and have fun!
