Swapping out a single color in Photoshop CS6 is a simple process. Using the color replacement tool you can paint over the desired color without changing the texture below.
Using the color replacement tool is a very basic way to replace a certain color. While the results are not always perfect, this is definitely the fastest way to swap the colors of the object while retaining the object’s natural appearance.
This is the starting image that is going to be used as an example during this tutorial.
1.Launch Photoshop and open the image that you will be editing.
2.Choose the Color Replacement Tool from palette on the left hand side.
3.Adjust the Mode to Hue, and choose either Sampling: Continuous or Sampling: Once which is what I have done for this tutorial.
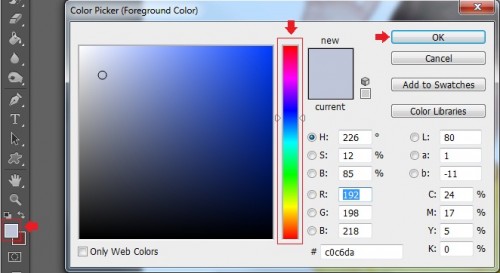
4.Pick the desired color through the Color Picker and click OK.
5.Now try it out. Start coloring over the color you want to replace. You may need to adjust depending on your background. If the background is similar to the subject, then you will need to lower the tolerance. If the background color is not similar to the subject, then you can have a much higher tolerance setting.
Do not worry if you go out of the boundaries and color “outside of the lines.” We will fix this in the next step.
6.From the brushes palate select the History Brush Tool.
7.Using the History Brush Tool, go over the parts that you want to keep the same. In our example, we will want the boy’s arms preserved.
8.Repeat all the steps after 5 until you are satisfied with the results.


