When configuring a Spring project, it is either necessary to write extensive amounts of XML configuration code or to write moderate amounts of XML configuration code and enable annotations. When annotations are enabled, Spring parses the project’s Java beans in order to find these annotations. This allows the developer to push some of the configuring to the Java bean code instead of keeping it all in the XML configuration file. This guide will show you how to enable annotations in Spring.
1.In your Spring enabled Java project, open the applicationContext.xml file, and add the annotation-config tag from the context namespace into the file. This tells Spring to check for annotations.

2.In the same applicationContext.xml file, add the component-scan tag from the context namespace to the file. It is necessary to pass the Java package to the base-package parameter in this configuration. This will tell Spring which Java beans to scan for annotations. In this example, we will use the com.test.project package.

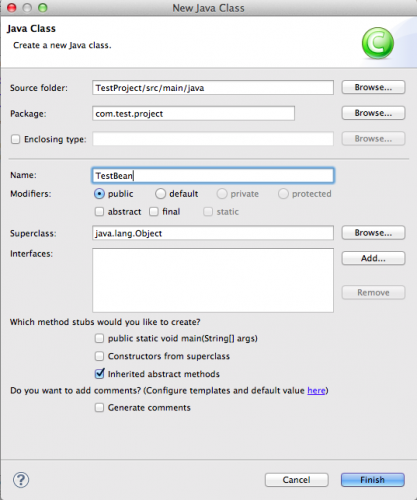
3.Create a Java class in src/main/resources with package name com.test.project and bean name TestBean. This bean is created in the previously defined package that Spring will scan for annotations, so any annotations defined in this bean should be picked up by Spring.

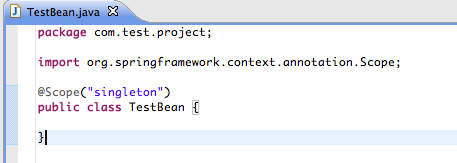
4.One simple annotation that is possible within Spring is the @scope annotation. This annotation will specify the scope of the bean and can have values of singleton, prototype, request, session, or custom. For our new TestBean.java class, we will set the scope of the bean to be singleton. This will ensure that only one instance of the TestBean class will be created in the Spring container. Place the @scope annotation before the class definition as shown in the screenshot for Step 4.

Now that annotations are configured for your Spring project you may use any annotations that are available from Spring. A quick Google search reveals the many possibilities!

