If you do not use your iTunes account anymore or if you have switched to a new one, make sure to remove your credit card from the unused account. This will ensure that no one will be able to obtain your card information even if they manage to access your iTunes account.
1. Launch iTunes.
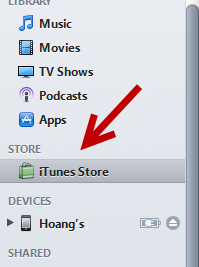
2. Access the iTunes Store from the left side bar. If it is hidden, press Ctrl + S to reveal it.
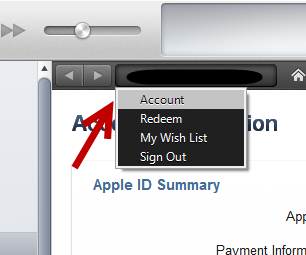
3. Once the store has loaded completely, click on your account at the top of the page, and choose Account. You will need to sign in if you have not.
4. In the Account page, find the Payment Information option, and click Edit.

5. Next, you will be redirected to the Payment Information page. From there, you can see all the information concerning your attached credit card. To remove it from your account, click None. Finally, click Done to save the change.
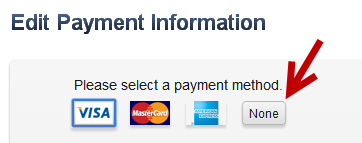
6. If the program saves your information successfully, you should see that the Payment Information is now set to No credit card on file. That means the credit card has been removed.

7. Exit the store.
Enable Two-Step Verification to Make Your Account More Secure
To prevent unauthorized access to your current account and to your credit card information, you should consider enabling the two-step verification feature. When you enable this feature, the system will ask for an addition code, which is sent to your registered trusted devices before you can make a purchase on a new device.
Please note that this feature is not available worldwide. The company is trying to expand it to more countries as soon as possible.
1. To turn this feature on, visit the Apple ID page, and sign in to your account.
2. Go to the Password & Security section, find the Two-Step Verification option, and click Get started.

3. Follow the setup wizard to set up the feature.
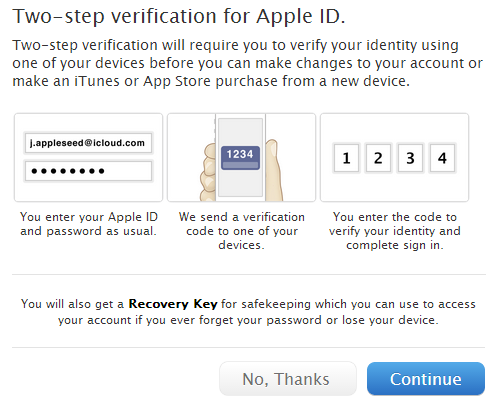
4. After completing the setup wizard, you will have to wait for three days to continue the setup. This is to ensure that no one other than you can set up this option.


