An Apple Watch is very similar to its iPhone counterpart regarding how you navigate between screens. You can do it from the storyboard or the code. Learn how to do both in this tutorial.
Please note that the code within this tutorial is written in Swift.
Before you follow this tutorial, create a new Xcode project, add the WatchKit target, and two interface controllers to the Interface.storyboard file under the WatchKit App target. For the first interface, add a button. For the second one, add a label containing a unique message so that you know the second screen is being displayed. You can find the button and label objects in the Objects library.
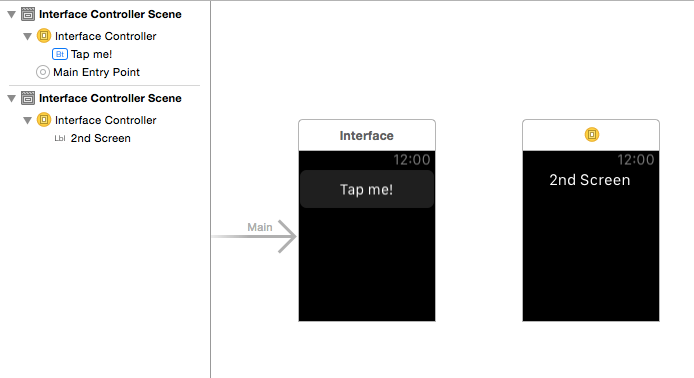
Navigating to the second screen from code:
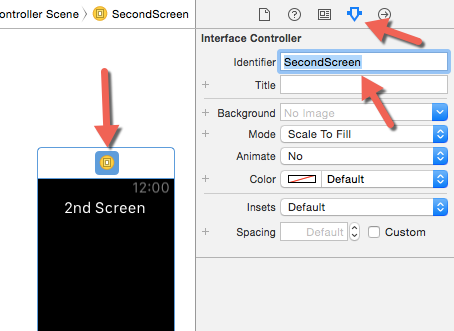
1. In order to move to the second screen from code, you have to add an identifier for that view controller in the Attributes inspector. In this tutorial, I have named the target screen’s identifier SecondScreen.
2. Select the first view controller, open the Assistant Editor, control + drag the button to the code file, set the Connection type to Action, give it a descriptive name, and click Connect.
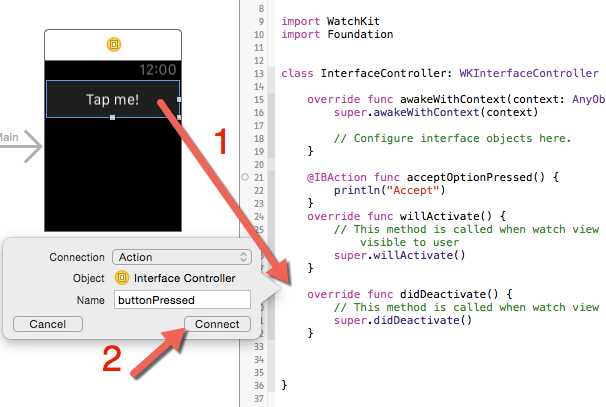
3. The following codes may be added inside the new action:
If you want a push segue, add the following code: pushControllerWithName(“Your-second-screen-identifier”, context: nil).
If you want a modal segue, add the following code: presentControllerWithName(“Your-second-screen-identifier”, context: nil).
The context parameter is used for passing data between the two screens. For this simple tutorial, there is nothing to pass between the two screens, so I will set it to nil. The context is of type AnyObject, so you can pass anything you want. In the second screen, you extract the data inside the awakeWithContext method. You probably have to downcast it to the desired type using as?, since AnyObject is too generic.

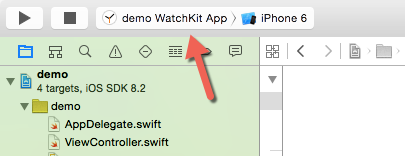
4. Switch to the WatchKit App scheme, and run the app. When you click the button, the second screen will be displayed. If there are any crashes, double-check the identifier of the second view controller.
Navigating to another screen from the storyboard:
This method is easier than the previous one. However, it gives you less control over the actions you can take (e.g., performing additional tasks before moving to another screen, passing data, etc. ). You can use it whenever you simply want to go from one screen to another. For more control, use the first method.
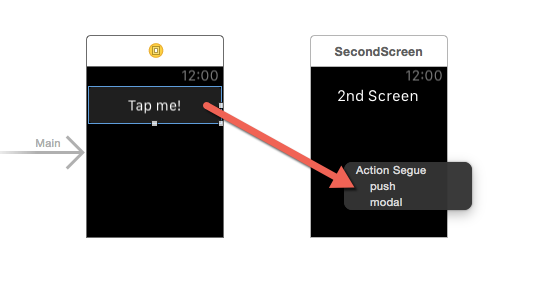
1. Control + drag the button from the first screen to the second screen. When you see the Action Segue window, choose either push or modal.
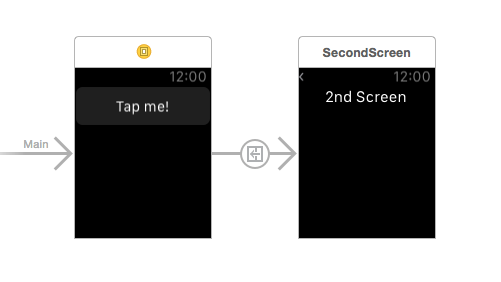
2. Once you set the action segue type, your storyboard will look like the image below.
3. Run the WatchKit App scheme, and verify that everything works as expected.

